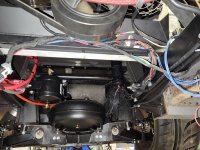
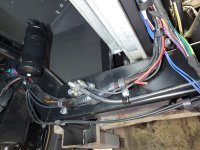
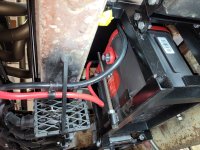
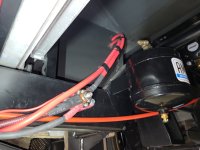
1967 Dodge A-100 Hot rod sort of rat rod build thread.

All of them have something down in that hole and I don't think it is packed full of sand although it's possible I guess. I'm certainly not going to start poking around in there.
 

Attachments

  • 20241019_181644.jpg
    20241019_181644.jpg
    3 MB · Views: 8
Sent a couple messages out and got a military surplus guy to respond this evening........ Well, from what I know those are tracer rounds. The white in the holes is the chemical that produces a glow when they are fired. I'm not sure what chemical it is, but I wouldn't drill into them until you verify whether it can be safely drilled. Unfortunately I'm also not sure where to find that info.
 
So I have nine of those bullets. Wonder how I could find out what these are. I don't see any markings anywhere although some of them are pretty Rusty from laying on the ground for probably 60 years. Would love to use a couple of these up there. Maybe find someone in town I could take these two and have them look at them. Certainly easy for me to set a couple up in the lathe and drill them out.

So you haven't been in that box for 15 years?? How long before that did you actually find all that stuff??

That's really cool! 👍🏼

 
I always thought it was sulfur and maybe way back in the day it might have been.

In NATO standard ammunition (including US), the oxidizer salt is usually a mixture of strontium compounds (nitrate, peroxide, etc.) and the metallic fuel is magnesium. Burning strontium yields a bright red light. Russian and Chinese tracer ammunition generates green light using barium salts.
 
So you haven't been in that box for 15 years?? How long before that did you actually find all that stuff??

That's really cool! 👍🏼

I painted and put those bullets together from all of it. I am guessing 15 years ago. Made some extras and gave them away to a few people like my dad and others. Then what you see got put in a bucket and I have not looked at them for a long time. Fun part was finding them out there.
 
So these all look to be the same shorter projectiles that mushroomed out. You can see the same stuff inside of them from the inside. I am guessing this stuff is not dangerous as it is but if I start drilling into the end of these it will create heat and Sparks so not sure. I did send it some emails out to some military ammunition guys and hopefully when someone is back in their shop tomorrow they might be able to give me an answer.
 

Attachments

  • 20241020_104624.jpg
    20241020_104624.jpg
    1.8 MB · Views: 6
Then I have all of these. Looking online and this screenshot it looks like these are called Vulcan rounds. Online it says they are inert and they do not have any hole or material in the back. I could always take two of these and make my two bullets for the front. They are longer and would stick out further.
 

Attachments

  • 20241020_105207.jpg
    20241020_105207.jpg
    1.8 MB · Views: 4
  • 20241020_105211.jpg
    20241020_105211.jpg
    3 MB · Views: 4
  • Screenshot_20241019_204116_Chrome.jpg
    Screenshot_20241019_204116_Chrome.jpg
    815.1 KB · Views: 4
Talk to this guy today and he sent me this email back. So I clamped it in my vise at home and drilled it out. I ain't scared no more.
 

Attachments

  • 20241021_172649.jpg
    20241021_172649.jpg
    2.8 MB · Views: 10
  • Screenshot_20241021_172756_Email.jpg
    Screenshot_20241021_172756_Email.jpg
    296.9 KB · Views: 10
Once I drilled in roughly 5/8 of an inch that steel got super hard. Regular drill bit would not even drill it in the lathe. Had to go slow with it chattering like crazy. Even the back side tapping for the set screws that is some really strong steel. Probably work hardened from all the heat as well. Did a little two-tone and I masked off the copper rifling. I love it.
 

Attachments

  • 20241101_092630.jpg
    20241101_092630.jpg
    3.6 MB · Views: 7
  • 20241101_092654.jpg
    20241101_092654.jpg
    3.5 MB · Views: 7
  • 20241101_093131.jpg
    20241101_093131.jpg
    3.2 MB · Views: 7
I made the transmission shift cable bracket out of three pieces of 1/8 steel. Super strong.
 

Attachments

  • 20241101_102834.jpg
    20241101_102834.jpg
    3.3 MB · Views: 3
  • 20241101_102823.jpg
    20241101_102823.jpg
    3.3 MB · Views: 3
  • 20241101_102238.jpg
    20241101_102238.jpg
    3.4 MB · Views: 3
  • 20241101_102212.jpg
    20241101_102212.jpg
    3.8 MB · Views: 3
  • 20241101_101402.jpg
    20241101_101402.jpg
    3.6 MB · Views: 3
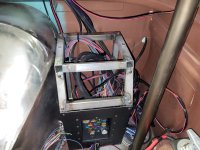
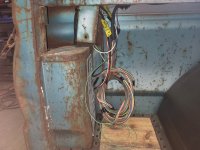
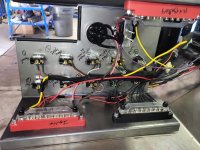
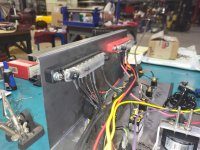
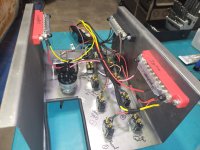
Certainly some work to do but the wiring has come a long long way. Spencer has been killing it. Tremendous amount of work to wire this whole truck and everything that is on it. I have the patina shop logo and all the back bolts for the cradle torqued for final hopefully.
 

Attachments

  • 20241101_102037.jpg
    20241101_102037.jpg
    3.8 MB · Views: 9
  • 20241101_102116.jpg
    20241101_102116.jpg
    3.8 MB · Views: 7
  • 20241101_102725.jpg
    20241101_102725.jpg
    3.4 MB · Views: 7
  • 20241101_102717.jpg
    20241101_102717.jpg
    3.4 MB · Views: 7
  • 20241101_102651.jpg
    20241101_102651.jpg
    3.3 MB · Views: 8
  • 20241101_102635.jpg
    20241101_102635.jpg
    3.1 MB · Views: 8
  • 20241101_102450.jpg
    20241101_102450.jpg
    3.5 MB · Views: 8
  • 20241101_102355.jpg
    20241101_102355.jpg
    3.3 MB · Views: 9
  • 20241101_102338.jpg
    20241101_102338.jpg
    3.2 MB · Views: 9
  • 20241101_102312.jpg
    20241101_102312.jpg
    3.1 MB · Views: 9
  • 20241101_102246.jpg
    20241101_102246.jpg
    3.5 MB · Views: 9
  • 20241101_102015.jpg
    20241101_102015.jpg
    3.5 MB · Views: 9
  • 20241030_113711.jpg
    20241030_113711.jpg
    3.5 MB · Views: 9
  • 20241101_093704.jpg
    20241101_093704.jpg
    3.1 MB · Views: 9
  • 20241101_093646.jpg
    20241101_093646.jpg
    3.3 MB · Views: 9
Finally after about 3 weeks back and forth I just got insurance put on this truck. Stated value policy way way lower than what I have in it or what it would take to build but at least it has some coverage.
 
Squared everything up with some string this morning. And then set the rear and front toe in. It is all within a 16th of an inch and then the alignment guys can take it from there. I have no idea what we're going to do on camber for this truck. I was thinking about having the alignment done before we run it on the dyno but I have the rear pretty square so I don't think I will worry too much about it. Probably end up driving it and then play with bump steer later on. Maybe I'll get lucky and it will be close enough.
 

Attachments

  • 20241105_082635.jpg
    20241105_082635.jpg
    3.6 MB · Views: 8
  • 20241105_082642.jpg
    20241105_082642.jpg
    3.9 MB · Views: 8
  • 20241105_082708.jpg
    20241105_082708.jpg
    3.7 MB · Views: 8
  • 20241105_082722.jpg
    20241105_082722.jpg
    4 MB · Views: 7
Repop replacement mirrors for this truck. Suckers were expensive but this will give me the look that I want. Need to try glass bead the Chrome on these and paint them. That might be fun.
 

Attachments

  • 20241105_151134.jpg
    20241105_151134.jpg
    3.4 MB · Views: 5
  • 20241105_151141.jpg
    20241105_151141.jpg
    3.8 MB · Views: 5
Repop replacement mirrors for this truck. Suckers were expensive but this will give me the look that I want. Need to try glass bead the Chrome on these and paint them. That might be fun.

Paint them? Or just let them rust, after the blast?

🤔
 
Back
Top