1967 Dodge A-100 Hot rod sort of rat rod build thread.

Been thinking for a long time how I wanted to seal the floor where the steering shaft comes through. Found this cool guy bearing and ordered it. 35 degrees of tilt for the Spherical Bearing.
 

Attachments

  • SWE405-10405.jpg
    SWE405-10405.jpg
    114.1 KB · Views: 2
I have no idea how this is going to work but I took 10 inches out of the stock front Corvette sway bar. Certainly will make it stiffer but the truck is heavier as well. Put a piece of 5/8 solid steel rod pressed in both sides. Seven or eight rossette welds in each side. And two roll pins in each side. I think it should hold. LOL. Then for the rear today I ordered all the pieces to custom build a rear sway bar from Paul Horton welder series. I think I have a game plan how to do the rear.
 

Attachments

  • 20250205_075210.jpg
    20250205_075210.jpg
    2.9 MB · Views: 8
  • 20250205_075232.jpg
    20250205_075232.jpg
    2.9 MB · Views: 8
  • 20250205_081218.jpg
    20250205_081218.jpg
    3.3 MB · Views: 8
  • 20250205_112549.jpg
    20250205_112549.jpg
    3.4 MB · Views: 8
Throttle pedal has a lot of travel and not as comfortable as I would like when pushing down at full throttle. So this morning on the mill I whittled out a toe block from aluminum. Just add paint.
 

Attachments

  • 20250206_100726.jpg
    20250206_100726.jpg
    3.2 MB · Views: 7
Whole lot of work for something that may or may not work. Don't know till you try though. If I have to custom build a sway bar for the front it will be quite a project. Shortening this thing 10 in I'm guessing it might be too stiff. Track width on this is only 62 and 1/2 in. Pretty damn narrow. I had an RZR 800 that was a 50 inch wide car. After putting super ATV arms on it it made it 60 in. Still hard for me to wrap my head around how narrow the front of this truck is. Although those 295 front tires will be putting 10 in of rubber on the ground. That's bigger than the rear tire on a lot of cars.
 

Attachments

  • 20250214_072909.jpg
    20250214_072909.jpg
    3.8 MB · Views: 10
  • 20250214_072854.jpg
    20250214_072854.jpg
    3.9 MB · Views: 10
  • 20250214_070247.jpg
    20250214_070247.jpg
    3.6 MB · Views: 10
  • 20250214_065108.jpg
    20250214_065108.jpg
    3.4 MB · Views: 10
  • 20250214_065048.jpg
    20250214_065048.jpg
    4.1 MB · Views: 11
  • 20250213_084205.jpg
    20250213_084205.jpg
    2.9 MB · Views: 9
  • 20250213_084150.jpg
    20250213_084150.jpg
    4 MB · Views: 9
  • 20250213_072004.jpg
    20250213_072004.jpg
    3.7 MB · Views: 11
These two pics show the angle of the sway bar link with the truck at ride height not too bad.
 

Attachments

  • 20250214_073741.jpg
    20250214_073741.jpg
    3.1 MB · Views: 7
  • 20250214_073755.jpg
    20250214_073755.jpg
    3.6 MB · Views: 7
Then these pics show with air out of the bags in the tire at full compression. Pretty steep angle I move that sway bar forward three quarters of an inch which of course changed the angle drastically on these tie rod links. Probably need to buy an aftermarket straight tie rod link and then use spacers to straighten it out a little bit. I might try this to begin with though. Although that stud is very close to the airbag as well.
 

Attachments

  • 20250214_074406.jpg
    20250214_074406.jpg
    2.9 MB · Views: 6
  • 20250214_074357.jpg
    20250214_074357.jpg
    3.2 MB · Views: 5
  • 20250214_074346.jpg
    20250214_074346.jpg
    3.1 MB · Views: 6
  • 20250214_074312.jpg
    20250214_074312.jpg
    3 MB · Views: 6
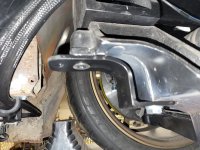
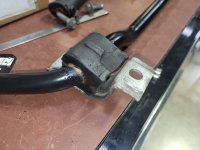
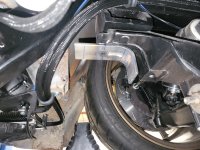
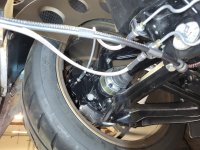
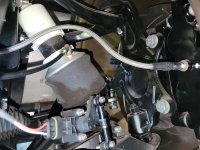
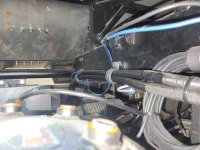
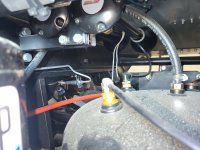
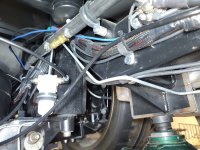
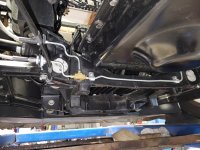
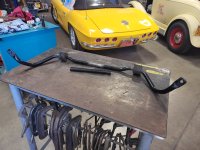
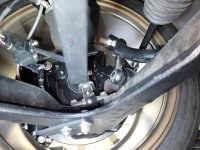
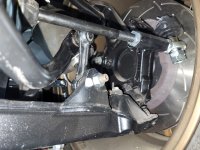
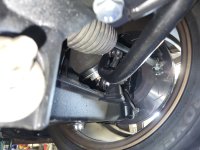
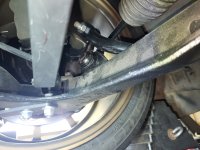
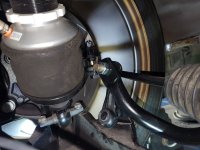
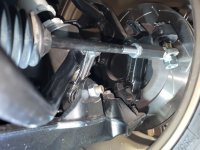
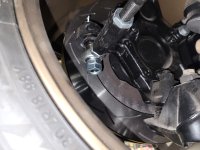
That Corvette bump steer kit I bought had a big tall lock nut. At least with this spacer in it and guessing at the bumpster right now the lock nut portion was not even on the threads. So I bought some thinner nuts, red locted it, and double nutted it. Other option at some point when I have everything figured out is to drill it and put a cotter pin in it. Not sure why they would sell that kit that way. Looks like if I try purchase aftermarket sway bar links it won't make a difference. Who knows this sway bar may need further Fab work to try change that angle. I think these sway bars for this truck are going to be a work in process. My rear sway bar kit was shipped out of Canada February 5th and I don't even have a tracking number yet. LOL
 

Attachments

  • 20250214_075039.jpg
    20250214_075039.jpg
    3 MB · Views: 5
Main double hydraulic braking system is all plumbed. Still need to do a bunch of clamps to hold it all down. Mounted the proportioning valve so I can reach down and access it from the top master cylinder lid and not have to get under the truck.
 

Attachments

  • 20250214_075711.jpg
    20250214_075711.jpg
    4 MB · Views: 5
  • 20250214_075655.jpg
    20250214_075655.jpg
    3 MB · Views: 6
  • 20250214_075555.jpg
    20250214_075555.jpg
    3.4 MB · Views: 5
  • 20250214_075534.jpg
    20250214_075534.jpg
    3.4 MB · Views: 5
  • 20250214_075514.jpg
    20250214_075514.jpg
    3.1 MB · Views: 5
  • 20250214_075500.jpg
    20250214_075500.jpg
    3.1 MB · Views: 5
  • 20250214_075446.jpg
    20250214_075446.jpg
    3.4 MB · Views: 5
  • 20250214_075423.jpg
    20250214_075423.jpg
    3.9 MB · Views: 5
  • 20250214_075411.jpg
    20250214_075411.jpg
    3.5 MB · Views: 5
  • 20250214_075403.jpg
    20250214_075403.jpg
    3.3 MB · Views: 5
  • 20250214_075349.jpg
    20250214_075349.jpg
    4.3 MB · Views: 6
I made two 1/2 thick steel blocks to mount the turning brake lever which of course will be the auxiliary oh s*** braking system. I have to pull the rear tires back off to mount those rear calipers. Not looking forward to that. This will probably get plumbed first and I will end up driving the truck without that hooked up. Not for long though.
 

Attachments

  • 20250214_080155.jpg
    20250214_080155.jpg
    3.3 MB · Views: 6
  • 20250214_080213.jpg
    20250214_080213.jpg
    3.3 MB · Views: 6
Rear rack is completed with hold Downs and straps to hold the ice chest and lawn chairs.
 

Attachments

  • 20250214_080500.jpg
    20250214_080500.jpg
    3.2 MB · Views: 9
  • 20250214_080451.jpg
    20250214_080451.jpg
    2.9 MB · Views: 9
  • 20250214_080435.jpg
    20250214_080435.jpg
    3.7 MB · Views: 9
Getting very very close. Still a lot to do but in the scope of this entire project not very far to get this truck on the dyno. I can now actually make a list. Some wiring left but that is probably 95% done on the truck. Seal the floor with a rubber boot and uniball bearing where the steering shaft comes through. Power up the airbag system and get that working. Put brake fluid in and bleed both Master cylinders to get the braking systems working. Of course later on do the auxiliary brake system which includes pulling the rear wheels off which sucks on this truck. I need to make a cover that goes under the center console to hide the wiring from the big holes in the side of the console where the seat belts come through. Fuel tank is bolted in but I need to tap threads on the fuel cap lower piece and get that all installed. Finish wiring and get the electric power steering unit functioning. Do some grinding and deburring under the front and then put some flat black paint behind the grill. Then install the front grill. Install my little heavy duty brackets under the rear fender wells so as not to just trust all of the Allen bolts going into the wood. Install the seat belts and seats along with harnesses. Finish the sound system. Speaker wires are run to the door but need to go through rubber boots into the door and be hooked up. Seal the floor or the transmission shift cable goes through. Put the truck on the dyno and tune it. Then it needs to go to alignment to have the front and rear toe in set and then alignment done. I think I will just have them set all of the camber and angles just like a stock C5 corvette. Still need to build the rear sway bar once I get those parts. I need to make a foot box for the passenger side so my wife's feet have something to touch. LOL. Have my buddy plasma cut out and bend some little boxes to go on each side of the seat on the floor for wallet phone and small items. I thinking about having him cut Chevy logos and Dodge penstar emblems alternating going around the edges of that. Have him bend that since I sold the brake and then I would just finish weld it. Then of course down the road dynomat the interior put carpet in it and finish the headliner.
 
Picking up a set of scales this afternoon and tomorrow I'm going to be weighing this truck. Anybody want to guess the weight.
 
My 800 after the Super ATV arms on it. 60" wide. Truck is only a couple inches wider than that in the front. :p 
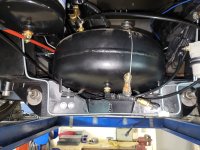
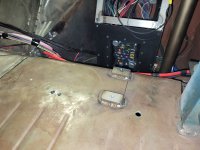
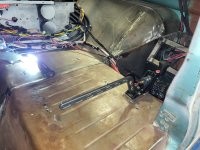
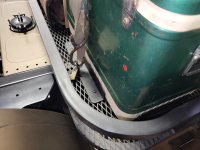
I am going with 3780 lbs. Oh and add an aluminum rear skid plate for the gas tank to my list.
 

Attachments

  • IMG_0783.JPG
    IMG_0783.JPG
    2.2 MB · Views: 2
  • IMG_0785.JPG
    IMG_0785.JPG
    2.4 MB · Views: 2
.
 

Attachments

  • 479490123_10226708831456202_3416722039570296991_n.jpg
    479490123_10226708831456202_3416722039570296991_n.jpg
    264 KB · Views: 6
12 gallons of fuel in the tank so a little over half. Couple boxes of dynamat. All of the seat belts and harnesses. Time to warm up the scales. Last chance to guess.
 

Attachments

  • 20250215_091119.jpg
    20250215_091119.jpg
    3.9 MB · Views: 9
  • 20250215_091023.jpg
    20250215_091023.jpg
    4 MB · Views: 9
  • 20250215_090934.jpg
    20250215_090934.jpg
    3.7 MB · Views: 9
Back
Top