Country Coach intrigue 32 ft (((((Solar install)))))

Lithium batteries in bulk charging state will accept large amounts of charging current. Alternators are stupid and will provide their max output until they overheat as most are not 100% duty cycle rated. There are all sorts of aftermarket regulators and battery charge controllers available that will cycle the alternator X minutes on and X minutes off, effectively producing a 50% duty cycle (sort of). To me, that is still putting a lot of stress on the alternator. The DC to DC charger is the best solution as it solves two issues with charging a lithium battery. First, it limits the load placed on your alternator and secondly, it provides the correct charging curve for a lithium battery. For your application, I would think the DC to DC would be ideal as you will be discharging your battery significantly overnight so you will be recharging in the bulk high amperage state often. Placing the DC to DC between your battery and alternator will definitely save your alternator. Only downside is recharging time will be increased due to the lower charging current. Really no need for the DC to DC charger or alternator charging of my coach batteries in my Moho as the solar, genset ,shore power and battery bank capacity (920AH) are more than enough.
Sandkist has some valid points.
On mine, I kept the alternator charging the start batteries only and solar/gen set/shore power charges the house batteries along with a trickle charger from the house batteries to the start batteries (to insure my start batteries are full when I boondock for extended periods). My house batteries are lithium and start batteries are wet cell. This solves most problems (disconnected the oil trigger switch on the relay that was mentioned to separate the systems but it still leaves the jumper switch in the coach available to use if start batteries die). The other issue that it solved was potential alternator damage from abrupt charging cut-off on lithium system (different charging curved between lead acid and lithium). My system has been operating for about 3 years now and doesn't seem to have any issues. House batteries charge from solar while i am driving anyway. No DC to DC charger in my system.
 
Lithium batteries in bulk charging state will accept large amounts of charging current. Alternators are stupid and will provide their max output until they overheat as most are not 100% duty cycle rated. There are all sorts of aftermarket regulators and battery charge controllers available that will cycle the alternator X minutes on and X minutes off, effectively producing a 50% duty cycle (sort of). To me, that is still putting a lot of stress on the alternator. The DC to DC charger is the best solution as it solves two issues with charging a lithium battery. First, it limits the load placed on your alternator and secondly, it provides the correct charging curve for a lithium battery. For your application, I would think the DC to DC would be ideal as you will be discharging your battery significantly overnight so you will be recharging in the bulk high amperage state often. Placing the DC to DC between your battery and alternator will definitely save your alternator. Only downside is recharging time will be increased due to the lower charging current. Really no need for the DC to DC charger or alternator charging of my coach batteries in my Moho as the solar, genset ,shore power and battery bank capacity (920AH) are more than enough.
Ah word. @onanysunday was talking about DC to DC chargers, which you said you didn't want to run because of alternator issues. Making sure there wasn't some aspect I missed. Friend of mine went with the self-contained "alternator charger" for his, but I really don't see much difference between that and the DC to DC charger other it costing 2x as much and you have to terminate it yourself.

Thanks!
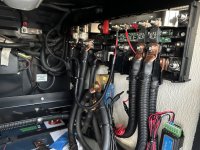
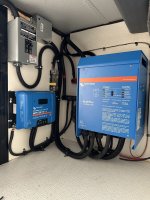
I was quickly running out of physical space for components. I was planning on using a DC to DC charger to protect my alternator but it would not play well with my battery control center. In the end it really wasn’t necessary for my application so why make it more complex than need be.LOL
IMG_3761.jpegIMG_3756.jpeg
 
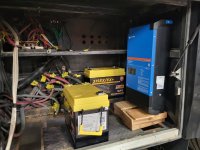
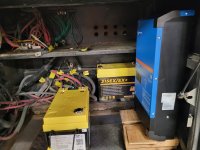
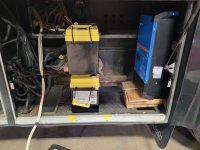
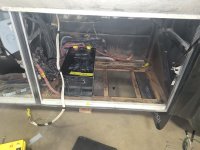
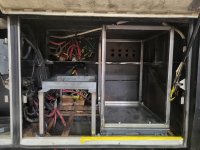
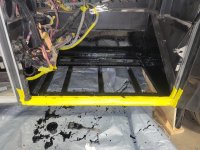
Well I've gone back to maybe trying to fit all of this into the compartment where the batteries were. Don't want to lose the storage inside and all the runs are shorter and much easier to install everything here. So I have two choices. Right now this battery compartment has expanded metal underneath and part of it to let a whole bunch of air and sand and crap get in here. I can either completely seal the cabinet. Or I can make a box that goes over the inverter. Either way I was thinking about putting a k&N filter and outerwear over a hole to let the inverter get fresh air and of course probably put a fan blowing on it inside as well. Not sure which way to go here.
 

Attachments

  • 20250822_135654.jpg
    20250822_135654.jpg
    3.3 MB · Views: 8
  • 20250822_135700.jpg
    20250822_135700.jpg
    3.4 MB · Views: 8
Still have the issue of flight off gassing from the 8D AGM starting battery. Everything I have read the inverter and all the other components should be kept away from even an AGM battery. So I think my only option here would be to make a box to go around the inverter and then vent it. In the above section is where the links distributor, serbo, and controller would go. That area is currently vented but I think it needs to be sealed. Just because it is vented right where the engine is behind it and a lot of heat.
 
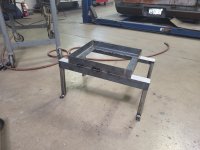
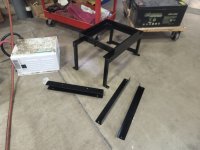
Thinking this might work better. Go up with my frame. Have my two lipos vertical. Then on the right side cut out that section of the upper shelf area, Mount all my Victron in that right side area and then make a box that seals it all in with my filter for venting. I think I'm liking this a little better.
 

Attachments

  • 20250822_143414.jpg
    20250822_143414.jpg
    3.1 MB · Views: 8
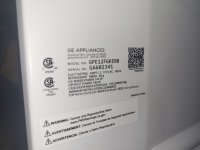
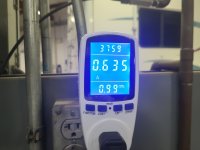
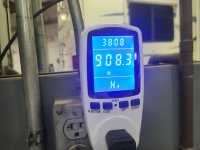
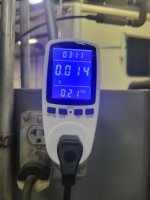
Well the tag says 1.2 amps. Let's put a meter on it and see what it actually draws.
 

Attachments

  • 20250825_100202.jpg
    20250825_100202.jpg
    2.9 MB · Views: 12
  • 20250825_100245.jpg
    20250825_100245.jpg
    1.5 MB · Views: 12
  • 20250825_100225.jpg
    20250825_100225.jpg
    3.4 MB · Views: 10
  • 20250825_100236.jpg
    20250825_100236.jpg
    3.3 MB · Views: 9
  • 20250825_100259.jpg
    20250825_100259.jpg
    3.4 MB · Views: 9
  • 20250825_100516.jpg
    20250825_100516.jpg
    3.3 MB · Views: 10
Kind of what I figured. This should work very well. Sucker cools down quick.
 

Attachments

  • 20250825_104830.jpg
    20250825_104830.jpg
    3.2 MB · Views: 10
  • 20250825_104838.jpg
    20250825_104838.jpg
    3.6 MB · Views: 10
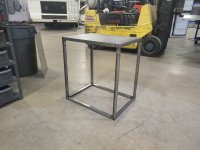
This is a big project. Lot of work already. Long way to go.
 

Attachments

  • 20250825_141659.jpg
    20250825_141659.jpg
    3.5 MB · Views: 9
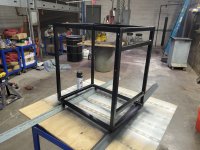
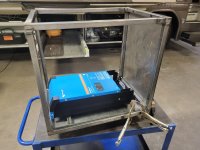
I had just looked at the inverter and never measured it. When I started I made that box 24 in tall. Realized that I needed room for my wires coming in underneath so I added 2 inch extensions to each of the four uprights. A little extra welding and grinding. LOL
 
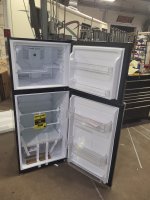
After 3 hours and the fridge is cooled down inside. This is just sitting in the shop and even with the coolers blowing it's still probably 90 in here.
 

Attachments

  • 20250825_142758.jpg
    20250825_142758.jpg
    1.6 MB · Views: 5
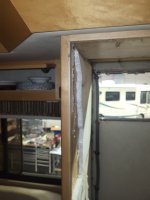
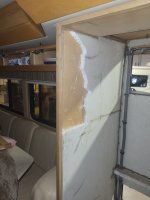
So this new fridge is about 24 and 1/16 wide. The opening is right at 24 in. So I have to scrape out all the styrofoam. And then that trim piece to the left I need to figure out how to shave 3/16 off of it in a nice straight line. Haven't quite figured out how to do that with the tools that I have.
 

Attachments

  • 20250825_084325.jpg
    20250825_084325.jpg
    1.3 MB · Views: 11
  • 20250825_084332.jpg
    20250825_084332.jpg
    776.1 KB · Views: 11
  • 20250825_084340.jpg
    20250825_084340.jpg
    1 MB · Views: 11
So this new fridge is about 24 and 1/16 wide. The opening is right at 24 in. So I have to scrape out all the styrofoam. And then that trim piece to the left I need to figure out how to shave 3/16 off of it in a nice straight line. Haven't quite figured out how to do that with the tools that I have.
straight edge and a cordless dewalt mini router
 
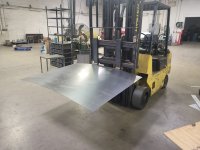
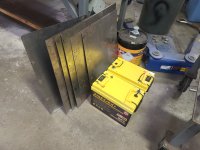
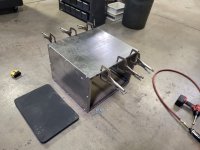
Crap that was a project. Ready for a break. Got out the POR 15 and painted the battery Bay after wire brushing the heck out of it. That is some of the nastiest stuff known to man. Always seems to be the place that these older motorhomes want to start to rust. And as much weight is on those pieces of box tubing I wanted to protect it for the future. Between the metal box and inside the bay I used 75 rivnuts ranging from quarter inch to 3/8 in. Tiring and tedious.Got all six of my panels made for the box. 18 gauge steel. Figured making it modular would just be easier to work on and assemble everything. Because that inverter will be enclosed in this box I think I want to extend the switch for it and remote mount on the outside. Also maybe put a glass in the front so I can see the lights on the front of the panel. I ordered a couple pieces of tempered glass and just have to figure out how to make a frame and cut the opening.
 

Attachments

  • 20250828_124116.jpg
    20250828_124116.jpg
    3.2 MB · Views: 7
  • 20250828_124006.jpg
    20250828_124006.jpg
    1.8 MB · Views: 8
  • 20250828_123952.jpg
    20250828_123952.jpg
    3.5 MB · Views: 6
  • 20250828_123929.jpg
    20250828_123929.jpg
    3 MB · Views: 6
  • 20250828_123922.jpg
    20250828_123922.jpg
    3.6 MB · Views: 6
  • 20250826_134911.jpg
    20250826_134911.jpg
    3.2 MB · Views: 6
  • 20250826_104753.jpg
    20250826_104753.jpg
    3.8 MB · Views: 7
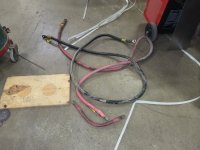
The big 4/0 cables that came out of it are probably seven or eight feet long. They will need to be shortened way up. The sheathing still looks good so I don't see why I can't shorten them and just put a new end on one end each cable.
 

Attachments

  • 20250828_124821.jpg
    20250828_124821.jpg
    3.9 MB · Views: 2
Toggle switch on the bottom of the inverter that I think I will remount outside the box.
 

Attachments

  • 20250828_125205.jpg
    20250828_125205.jpg
    3 MB · Views: 4
Back
Top