- Thread starter
- #81
602evo
Active member
- Aug 15, 2021
- 134
- 152
definitely want to do more night rides this season!Now you can lead our night rides! Props to you for running the old school look!

Follow along with the video below to see how to install our site as a web app on your home screen.
Note: This feature may not be available in some browsers.
definitely want to do more night rides this season!Now you can lead our night rides! Props to you for running the old school look!

Nothing good happens after dark.definitely want to do more night rides this season!
")

Haha! Luckily the lead time for powder was only a week or 2! so hopefully not tooo bad!Cutting it close my friend! Gonna have to throw that thing together quick lol.

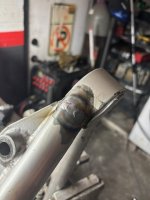
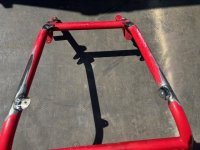
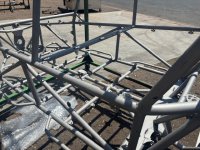
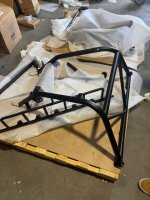
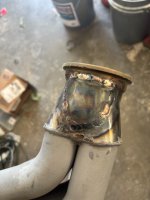
Was the weld on the tube (not the cup) on the arm a crack? If so, gonna add something over the top to keep it from cracking again?Dropped the chassis and other components off at Powder last Friday! The chassis, suspension components, light rack are all getting done in the same semi gloss black.
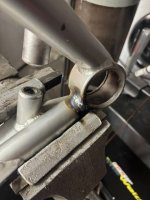
spent Thursday night getting the front arms ready. There was a spot near the uniball cup that wasnt welded originally, so completed this. as well as added some weld material over some areas on the lower arms where the original spindles had rubbed the arms. Also fininished welding some tabs onto the engine cage removable section since i will have a skid plate that goes up to where the engine cage starts to bend in the back!
It was from the arm rubbing the spindle due to too much steering. needed a stopper in the gearbox of some sort. It had the same issue on both sides. But now with the tatum spindles, and clearancing them a bit, im hoping the issue is gone. I will add a stopper in the steering box if needed.Was the weld on the tube (not the cup) on the arm a crack? If so, gonna add something over the top to keep it from cracking again?

Someone needed a turning brake.It was from the arm rubbing the spindle due to too much steering. needed a stopper in the gearbox of some sort. It had the same issue on both sides. But now with the tatum spindles, and clearancing them a bit, im hoping the issue is gone. I will add a stopper in the steering box if needed.
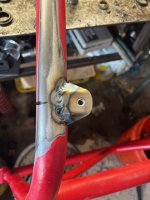
Here's how it looked prior to filling it in:
View attachment 155483
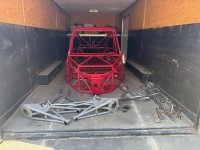
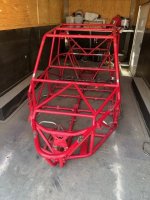
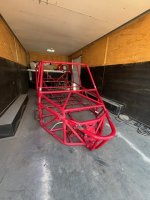
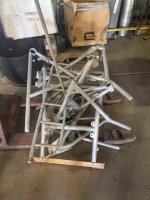
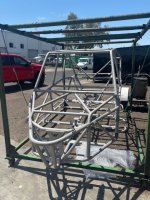
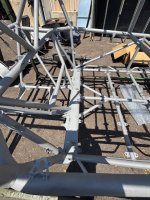
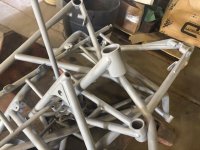
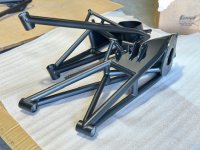
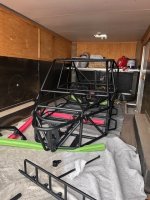
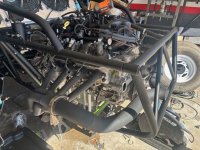
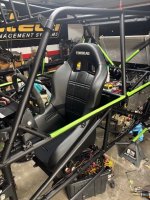
I hate to tell you this... but you wont like the BK120. Its too matte and the dust just sticks to it... Ask me how I know lol. Looks good tho!Picked everything up today from powder! I used Sun State Powder Coat in Phoenix. Edwin has been doing lots of Springs, brackets and other things for customers projects for me for a few years, so wanted to give them the business for this!
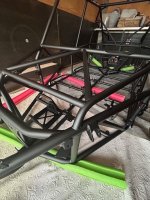
Everything turned out really good! The BK120 turned out a little more Matte than i was expecting, but overall I am happy with how it looks!
I did load everything up right before a Phoenix haboob, so there might be some dust on everything LOL.
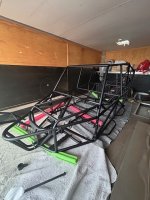
Will post more photos once I start assembly!
Ever seen that movie, The Car? 1977 with James Brolin....I hate to tell you this... but you wont like the BK120. Its too matte and the dust just sticks to it... Ask me how I know lol. Looks good tho!


That is EXACTLY what it looks like after 1 ride. Even my duster doesn't get it cleaned.Ever seen that movie, The Car? 1977 with James Brolin....
Kind of like this with the dust!
LOL
View attachment 156853View attachment 156854