1962 Corvette Resto Mod build

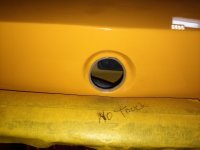
Forgot the condensate drain line for the AC unit. Dumps outside.

20210622_141504.jpg

 
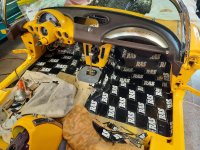
Probably 5 hours today and made some more progress with the Dynamat. Just takes a lot of time. Needed to finish up under the dash before installing the vent behind the hood, radio, speaker, and switch panel. Looks like we won't quite make the first of July for upholstery but should be within a week or two. After thrashing on this car since September I will be ready for a 2 month break. 

20210623_152814.jpg

 
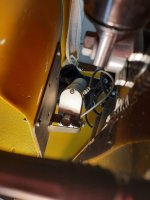
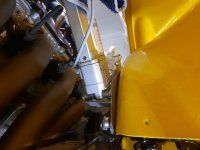
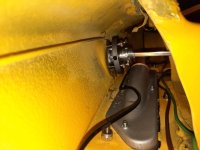
The electric hood ram is close to the exhaust and I think we need a heat shield to not burn it up. Hood does not open straight up but the only way to move the bottom of the ram forward is a completely different bracket and pully set up that moves the AC compressor out of the way. We are still talking about this. This bracket still needs powder coated. The other thing I am worried about is the hood staying flat with the ram on one side. Meaning the ram is only pulling down on one side of the hood. If we had a mechanical latch it would ruin the clean firewall and everything that has been removed. Not sure how this will play out. (In the pics that ram is laying against the firewall. A long way from the installed position)

20210618_133635.jpg

20210618_133449.jpg

 
Last edited by a moderator:
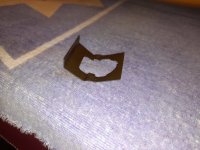
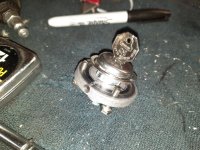
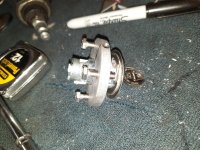
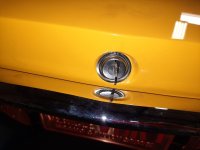
Sometimes the easiest job can turn into a project. The rear tumbler lock assembly for the trunk had two issues. Hole in the car was to big and we could not get the factory clip in on the back side. Very tight and you can barely get your hand in there for any leverage. Solution: Machine a steel ring that slips on and has two set screws then 4 bolts to tighten it down. Also machine a thin ring to epoxy in the hole to center it better. Perfect!

20210629_092019.jpg

20210629_094717.jpg

20210629_092031.jpg

20210629_092045.jpg

20210629_094745.jpg

20210629_094732.jpg

 
Last edited by a moderator:
Wood block added for a screw to hold the one side of the package tray under the grab bar. Since we are going to drive this car figured we need somewhere to throw your hat, keys, wallet. Instead of just running the screw up into fiberglass which always strip out. 

20210630_115603.jpg

 
Last edited by a moderator:
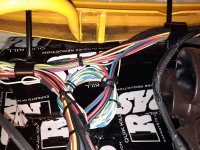
The little sleeves we glued everywhere worked out awesome. Needed a few wires coming in under the hood for the hood ram, AC compressor, and heater control valve.

20210629_101952.jpg

20210629_104118.jpg

 
Wiring is virtually done. Finally! One panel is hot with ignition and one is always hot. We came close to filling it with fuses.

20210630_120303.jpg

 
Our steel sleeves we welded to the support worked out great. Left side is so full it would be hard to get any more wires through it. Coil of wires zip tied are a full set of extra wires running through the floor and back up to the computer below the rear deck lid. Just in case we need any other wires. Above you can also see the bottom side of the hand levered vent that opens. It is installed.

20210630_120059 (1).jpg

 
Last edited by a moderator:
I had to do an off road trick at least one place in this car. lol. The ole zip tie and rubber hose trick. I have a ton of these on the Funco for power steering and boost gauge lines. That is the wire and plug going down to the fly by wire throttle.

20210630_112136.jpg

 
Everything is tucked way up. Nothing hanging down. Switch and bracket in the upper left with the up and down arrow is for the electric hood ram. Right side you can see the lever for the hand levered vent.

20210630_135425.jpg

 
One more of that left front fender well before we split off the wires, added the rest of the loom, and drilled the hole. Flash really washed out the color. Looks exactly like 64-67 C2 Corvette Sunfire yellow.

20210622_100206.jpg

 
Last edited by a moderator:
The amount of hours in something like this is stunning to me.  this is what separates the "Its a nice car" from "HOLY CRAP, did you see that car"!!! 

 
Most people don't realize the amount of work that goes into even small projects, let alone major ones. 
 
That is an amazing amount of skill in so many areas. Remind me to pay others to do this type of thing in the future!

 
I'm like a little kid today playing with the stereo. The little retro sound system with Bluetooth actually isn't completely horrible. I think we will be able to at least hear at going down the road. 

20210701_145808.jpg

20210701_145533.jpg

 
Approx. 18 hours total and happy to be done with the insulation. Came out great. Time to lay some carpet on it.

20210707_141138.jpg

20210707_141132.jpg

20210707_141154.jpg

20210707_141530.jpg

 
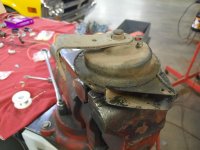
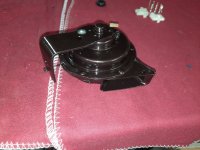
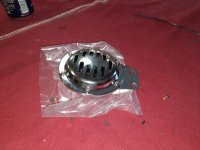
We bought a new horn from SoCal but it does not sound very good. Rehabbed a Jeep horn and to be installed. The Jeep has two horns. Low and high. We are only installing the high.  On the hunt for some brown seat belts that look nice. Looked at everything SoCal had and nothing looked good. Looking around online not finding anything I like so far.

20210707_151809.jpg

20210707_095833.jpg

20210707_141228.jpg

 
Tabs made for the throttle pedal and need to weld it together. Fitment might be tricky. Need  probably 5/8 floor clearance for the carpet and pad. I did grind some off the throttle for better clearance. 

20210707_151359.jpg

 
Back
Top