BaBaBouy
Well-known member
- May 6, 2021
- 800
- 1,384
Me rikey!
Follow along with the video below to see how to install our site as a web app on your home screen.
Note: This feature may not be available in some browsers.

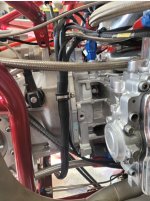
Thank you. Lots of planning, thought, questions, research, internet and youtube...lolWiring is coming out nice!
Those crooked ass labels make me want to stab babies and kill kittens!Didn't get everything done I had planned for today but got side tracked and needed to clean the workspace up a bit.
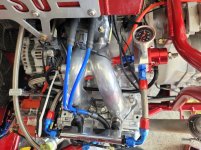
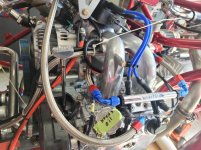
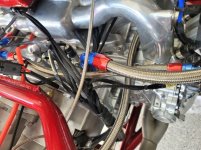
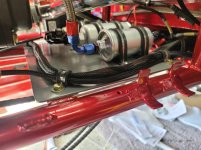
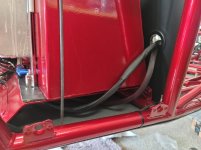
Mounted the relays and started terminating some of the components. Ran the computer harness to see how it will be routed and where my pull off points will be. Fabbed my new exhaust and blow off tube. Just need to find a TIG guy here in Havasu. Mounted front brake lines.
Tomorrow will be more harness work.
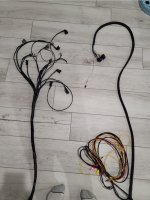
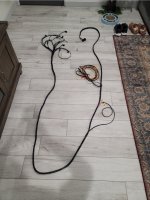
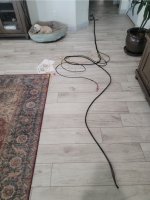
Here is a Pic of what the wiring used to be...This rat's nest has bugged me since I bought the car. It will finally be gone and have the Mac stamp of approval.
What about the ignition switch…?I have tags on the engine and trans for a reason!
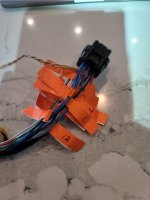
Make sure to affix the butt connections to an adjacent wire as part of a loom to prevent vibration damage at the connector.Just finished up the engine harness and will start laying out the computer harness and start terminating tomorrow.
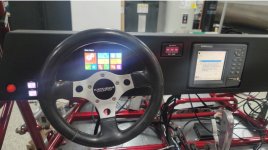
Fueltech uses a touchscreen start button. I'm wiring up my Switchpro to be a master on/off and then a button to turn on the Fueltech.What about the ignition switch…?
Make sure to affix the butt connections to an adjacent wire as part of a loom to prevent vibration damage at the connector.
I was joking about putting an oil reminder on the switch. I fail.Fueltech uses a touchscreen start button. I'm wiring up my Switchpro to be a master on/off and then a button to turn on the Fueltech.
I'm using the solder/heatshrink slices/terminals.
I am not tracking 100%. Do you have a pic of what your talking about?I was joking about putting an oil reminder on the switch. I fail.
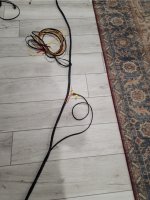
Yeah, the part where it goes into the heat shrink is a bend point with a weight next to it. If it’s not connected to an adjacent wire, even in looming, the connector will bounce and fatigue the wire, breaking it inside the insulation. I found this out the hard way with mine and those connectors.
I did tape around the bundle about every foot and if more than 2 splices in that foot, I put an extra tape wrap.I was joking about putting an oil reminder on the switch. I fail.
Yeah, the part where it goes into the heat shrink is a bend point with a weight next to it. If it’s not connected to an adjacent wire, even in looming, the connector will bounce and fatigue the wire, breaking it inside the insulation. I found this out the hard way with mine and those connectors.
No pic. But bend the wire with the splice in it. It will make a sharp bend where the splice ends. Copper isn’t very fatigue resistant, and the constant bouncing and solid engine mount vibration in a buggy means it can fail quickly.I am not tracking 100%. Do you have a pic of what you’re talking about?
Yeah. They’re great for strain relief since it grabs the insulation so well.I did tape around the bundle about every foot and if more than 2 splices in that foot, I put an extra tape wrap.
The solder heatshrink splices really do a great job. They glue into the insulation on the wire too.
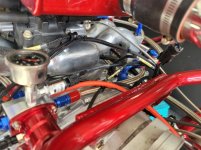
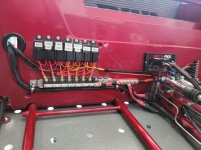


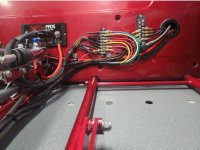
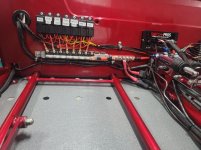
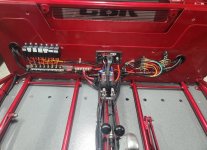

Couple of questions. For the main power wires from battery to distribution block it looks like you used 4awg?Pretty much done with the wiring. Tomorrow I'll program the SwitchPro and test everything out. Definitely happy with how it's turned out. I wanted clean and organized wiring, this now all makes ls sense to me.
Yes. 4 gauge for battery and power distribution to bus blocks. Make sure and get the right crimper. I bought a hammer style. worked very well.Couple of questions. For the main power wires from battery to distribution block it looks like you used 4awg?
Also, it looks like you went from the switch pro outputs to a termination block? What is the reason behind this?
I am going to wire my car over the summer and really dig how yours came out.