Flat screen tv for toyhauler

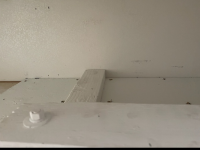
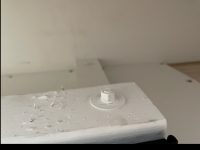
Your looking at this backwards. Instead of placing the TV towards the front of the coach place it on the back wall, you know the big flat ramp.  Take a couple of female threaded inserts screw them into the ramp door. Then either use a simple flat screen wall mount or screw a shelf into it.  Only draw back is before you drop the ramp you have to place the tv on the front bed, but 

The TV is in the center of the coach and can be seen by the entire coach, well except for the person laying in the rear bunk

You don't hit your head on a TV in the middle of where you walk

You don't walk in front of everyone every time you get up for a drink or go to the bathroom.
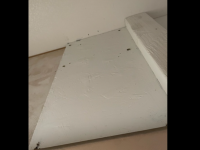
So that has its pros and cons. I like your thinking out of the box, but I have kids that stay in my trailer and they watch movies when they go to bed. The back bunk is their bed! Not to mention all of the wiring I would have to run back there that would have to be movable to open the ramp.  

 
So that has its pros and cons. I like your thinking out of the box, but I have kids that stay in my trailer and they watch movies when they go to bed. The back bunk is their bed! Not to mention all of the wiring I would have to run back there that would have to be movable to open the ramp.  
Tablets for kids.  Who wants kids' programming on the main screen anyway... :biggrin:

 
Tablets for kids.  Who wants kids' programming on the main screen anyway... :biggrin:
ok so kids I mean my kid and his girlfriend. They are 20 and have friends that come also. Along with my 12 and 13 year old niece and nephew. Anyways, tv mounted on back door will be a hard NEVER. Way too much work for something I enjoy 20% of the time. I’ve owned this trailer since new in 2005. So it’s not something I feel is a NEED. It’s a want from my wife that is low on the poll. I will post pics when it’s done. Should take a few hours to install and make the wife happy.

 
I made a TV mount in an old gearbox toy hauler of mine like the style cali kid posted. I don’t have any pictures but could probably get some soon (my friend has that toy hauler now). I used a 1/4” thick sheet of aluminum diamond plate (it matched the interior on that model) and put that under the storage shelf (when you walk under the shelf and look up you would be looking directly at it). I made a triangulated stand mount to set on top of the self that a tv hanging bracket could bolt to. I believe I used a few aluminum pieces of square tube to span the top shelf to spread the weight to some structurally supported part of the shelf. I then placed my triangulated tv mount on top of the rails and then through bolted it to the backing plate below the shelf. Since the tv is hanging off the front of that mount, it is trying to pull the back of the triangulated mount up toward the ceiling that is why I put a large piece of aluminum diamond plate under it and through bolted the mount to it. I believe it was a 50” screen and it is still there today. I did this about 6 years ago. Hope this helps, I will see if I can have my friend get pictures and I will send them.

 
I made a TV mount in an old gearbox toy hauler of mine like the style cali kid posted. I don’t have any pictures but could probably get some soon (my friend has that toy hauler now). I used a 1/4” thick sheet of aluminum diamond plate (it matched the interior on that model) and put that under the storage shelf (when you walk under the shelf and look up you would be looking directly at it). I made a triangulated stand mount to set on top of the self that a tv hanging bracket could bolt to. I believe I used a few aluminum pieces of square tube to span the top shelf to spread the weight to some structurally supported part of the shelf. I then placed my triangulated tv mount on top of the rails and then through bolted it to the backing plate below the shelf. Since the tv is hanging off the front of that mount, it is trying to pull the back of the triangulated mount up toward the ceiling that is why I put a large piece of aluminum diamond plate under it and through bolted the mount to it. I believe it was a 50” screen and it is still there today. I did this about 6 years ago. Hope this helps, I will see if I can have my friend get pictures and I will send them.
This is pretty much the plans I had. All thought processes are the same. Pics would be cool if you ever get around to it. Thanks

 
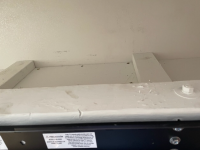
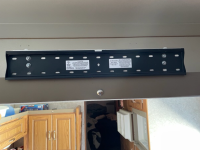
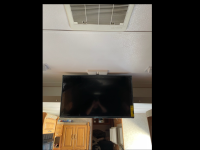
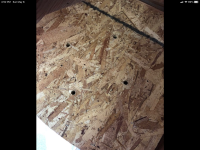
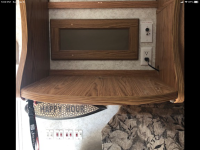
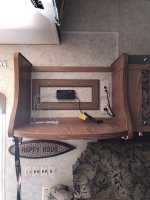
Ok so I spent the day making the mount, painting, and installing the mount and tv. I still need to wire the tv in and remove the damn lazy Susan for the old tv. Any ideas on how that damn thing is mounted?! Some pics of progress. I used a stud finder and found the stringers that hold the shelf. There is one along the wall, one along the front of the shelf, and one 12” from the front of the shelf. I cut a flat board to fit from front of shelf to the wall along with 2’ to each side of center equaling 48” x 20” x 5/8” board. I then cut two 2x4’s at 20”s. Next I cut a 4x4 the length of the tv mount. I drilled the 2x4’s and the 4x4 for 3/8’s bolts. I wanted 6 1/2” long bolts but all I could get easily was 8” long. I bolted the 4x4 to the 2x4’s using big fender washers and lock washers. Next I cut the excess threads off the bolts. I then centered the 2x4’s on the flat board I cut. I marked where the bolts were on the flat board and hole sawed the board to clear the washers and bolt heads. I then screwed the board to the 2x4’s. Next I painted the whole set up with flat white paint. After the paint dried, I installed the mount screwing the board to the shelf where the stringers were located. After measuring, I could see that the tv wasn’t going to clear the ceiling with the mounts the way they were. The bolts on the back of the tv were too low so I had to drill new holes in the tv hanger mount to lower the tv as far as possible. I also had to lower the flat mount for the tv hangers as low as possible. I drilled and mounted the flat mount to the 4x4 but needed to drill my own lower holes as the ones in the mount wouldn’t hit the meat of the wood. I then set the tv on the mount. There isn’t a whole lot of room to install the tv but it does fit without struggling. It sits about a 1/4” below the light on the ceiling once in place and tilted forward. There is 6’ 9” from the floor to the bottom of the tv so plenty of walking room. The tv is lite so I may just leave it mounted in transit. Everything is super sturdy and actually looks factory from below! 

MATERIALS USED:

2”x4”x4’ 

4”x4”x 3’

2’x4’x 5/8” plywood

1 5/8 wood screws

(2) 3/8” x 8” bolts and hardware

Tv mount that only tilts

43” Vizio Smart Tv

A8F1704E-4652-4230-983E-2ADCD1F0FD33.png

D788EC24-D36A-43CA-892D-4ED6FB22E45B.png

34E14680-8E60-4951-B5CA-CAF00E93BBC9.png

2300A5B0-7DCD-4949-BC9C-5F8CC01BAB01.png

8591985F-BD13-4C36-9C07-367BCA0027B9.png

8C4FA391-ED8D-4086-97A9-793AC589D912.png

18443543-EE2B-4925-8676-2271113FC233.png

 
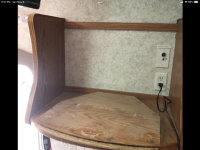
Again, any help on how to remove the lazy Susan for the old tv would be great!

 
Again, any help on how to remove the lazy Susan for the old tv would be great!
If your lazy susan is mounted like mine was, it's on rails that it slides in and out of the cabinet on. I slid it all the way out and removed the rear screws that hold the slider rails to the cabinet. I think I also slid it all the way back and managed to remove the front rail screws. There might have been catches on the rails allowing them to slide all the way off. Like drawer slide rails.

 
any pics of the lazy susan? you want to remove the guts or the whole cabinet?
I want to leave the cabinet but remove the swivel and board mounted to the swivel. I don’t see screws anywhere to remove the board from the swivel.

 
If your lazy susan is mounted like mine was, it's on rails that it slides in and out of the cabinet on. I slid it all the way out and removed the rear screws that hold the slider rails to the cabinet. I think I also slid it all the way back and managed to remove the front rail screws. There might have been catches on the rails allowing them to slide all the way off. Like drawer slide rails.
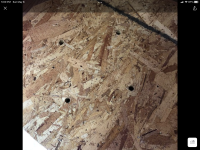
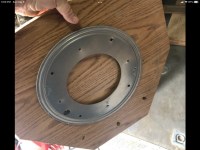
From what I can see under the board is a round swivel maybe 5” or 6” in diameter. No screws holding the board to the swivel or the swivel to the cabinet. Let me get some pics.

 
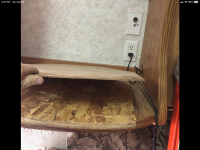
Ok here’s the deal with the lazy Susan. I needed to pull the laminate off the turntable board to access the screws to the lazy Susan. Actually, there is matching tape on the laminate that covers the screws but hard to see after 17 years of desert dust! Once I removed the screws I could remove the lazy Susan. Next I took one of the matching boards from the tv enclosure and screwed it to the wall to mount the inverter on. The inverter and rca cables are on order so when they come in I will post more pics of the install. For now this is what I’ve got.

EA547DE9-A155-45CF-A6D1-E4680AFD989E.png

B1FB89DA-1EB0-4032-ADB6-75F6D0E9D201.png

0F84F0AA-5BFD-433E-AE44-FDCC39E1632C.png

 
Well, I had to make a slight change. The board I mounted to the wall for the inverter needed some love. When I attached the inverter, via Velcro for easy replacement later, the vinyl started pulling from the wood. So I removed the center section and remounted the frame. I then attached the Velcro to the wall and it seems to be holding up perfect. I drilled a hole in the top of the cabinet to run the wires to the tv. I used 1/2” half round plastic covering to hide the wires. My OCD is really effing with me, as you can see from the pics, the horizontal wire covering is 1/16” off but it’s glued so I’m done! All wired and ready to go! After this season I will see if I need to install a sound bar and woofer.

051F8D65-BA57-4CEC-B6DD-C2FFCE1805C0.jpeg

 
Back
Top