1964 Dodge A-100 Hot rod sort of rat rod build thread.

My box with my two rear axles came in today. That thing weighs 67.1 lb. Holy crap those things are heavy.

20240827_170516.jpg

 
You know how you can't sleep the night before the first dune trip of the season? I am really starting to feel that way. I could be driving this truck in 60-90 days. I have been to hell and back building this thing. Really getting excited. This video gives me some great motivation. I am a week shy of two years when I got it.  Several customers have told me this truck could be in a booth at SEMA. It will be interesting when it gets out into the world.

I will say I am not going to burn off tires like he does in the vid. lol. 


Now that I have an air tank and system I can put some nice air horns on the truck.  I Like the Kleins. Also ordered a better 210 psi solenoid vs what comes in the kit. 


51sSCbW2rQL._AC_SL1000_.jpg

61TXZGYmmPL._AC_SL1500_.jpg

 
...
 

Attachments

  • 20240829_084249.jpg
    20240829_084249.jpg
    3.4 MB · Views: 4
  • 20240829_084255.jpg
    20240829_084255.jpg
    3.3 MB · Views: 4
  • 20240829_084259.jpg
    20240829_084259.jpg
    3.2 MB · Views: 4
  • 20240829_084306.jpg
    20240829_084306.jpg
    2.7 MB · Views: 4
  • 20240829_143925.jpg
    20240829_143925.jpg
    3.6 MB · Views: 5
  • 20240829_143915.jpg
    20240829_143915.jpg
    3.2 MB · Views: 5
  • 20240829_143900.jpg
    20240829_143900.jpg
    3.2 MB · Views: 5
  • 20240829_142617.jpg
    20240829_142617.jpg
    3.7 MB · Views: 5
  • 20240829_140859.jpg
    20240829_140859.jpg
    3.5 MB · Views: 5
  • 20240829_094219.jpg
    20240829_094219.jpg
    4.2 MB · Views: 6
  • 20240829_113315.jpg
    20240829_113315.jpg
    3.4 MB · Views: 5
Well the photos are blurry but if you click on it it becomes clear. Found some 4-in led s. After beating on the body with a hammer and then some grinding and drilling I got them to fit. Then masked it off and painted the trim ring flat black. I like it
 

Attachments

  • 20240831_073352.jpg
    20240831_073352.jpg
    3.4 MB · Views: 10
Well with the amount of power and torque going back to this trans and rear diff mount we didn't like how much movement was there. Although the motor mounts are the energy suspension polyurethane mounts I still wanted to give this more strength. Drilled the cradle with inch and a half holes and then dropped in some poly body mounts. Then made a new cross piece out of 3/8 steel. I think this will work well.
 

Attachments

  • 20240831_075348.jpg
    20240831_075348.jpg
    4.2 MB · Views: 5
  • 20240831_075411.jpg
    20240831_075411.jpg
    3.1 MB · Views: 5
  • 20240831_084210.jpg
    20240831_084210.jpg
    3.6 MB · Views: 5
Well that batwing oil pan in line with my mounts really made it challenging to get the motor in there. Had to pull the radiator forward about 8 in to get the motor to go way forward and then go down past the mounts. Still had to use two hoists and a ratchet strap to do it. If I ever have to pull this motor out in my garage at home I will build an A-frame that fits in there and bolts together. With two hoists. And buy a little better motor plate situation to be able to adjust back and forth. Because we keyed the harmonic balancer I went with a stock front GM bolt instead of arp. But ARP bolts for flexplate bolts along with the killer SFI flexplate.
 

Attachments

  • 20240831_154053.jpg
    20240831_154053.jpg
    3.6 MB · Views: 10
  • 20240831_154043.jpg
    20240831_154043.jpg
    3.8 MB · Views: 10
  • 20240831_144623.jpg
    20240831_144623.jpg
    3.4 MB · Views: 10
  • 20240831_144151.jpg
    20240831_144151.jpg
    3.4 MB · Views: 9
  • 20240831_141931.jpg
    20240831_141931.jpg
    3.2 MB · Views: 9
  • 20240831_090308.jpg
    20240831_090308.jpg
    3.4 MB · Views: 10
I had made that homemade fixture to hold the flex plate. It was from another project with a few washers was able to adapt it to the LS motor.
 
That was a hell of a fight to get that thing in this morning. I had cut the corners of my motor mounts welded to the frame to make clearance for the pan which I have plenty of room now. Problem is I can't lift the motor up high enough to slide the dirty dingo mounts in. They have studs sticking out. So for sure I need to trim those little corners back and make more clearance for next time the motor comes out. Hopefully not for a long time. Aftermarket starter is not even close. GM starter almost fits but stud lays against a corner of the bracket. So I'm going to have to cut that bracket and then weld a piece back in. I will try this used starter and see if it works. For a minute I was thinking about removing the front Dodge letters and the side logo on the door. Vector them and have them cut out of steel like I did the dash. But now I'm changing my mind. Might just leave these on there the way they are. Problem with the front letters is if you try to remove them it breaks the pins off the pot metal.
 

Attachments

  • 20240901_082318.jpg
    20240901_082318.jpg
    3.5 MB · Views: 12
  • 20240901_082326.jpg
    20240901_082326.jpg
    3.8 MB · Views: 11
  • 20240901_092802.jpg
    20240901_092802.jpg
    3.6 MB · Views: 12
  • 20240901_092535.jpg
    20240901_092535.jpg
    3 MB · Views: 11
  • 20240901_092508.jpg
    20240901_092508.jpg
    3.5 MB · Views: 11
  • 20240901_092450.jpg
    20240901_092450.jpg
    3.8 MB · Views: 11
  • 20240901_092428.jpg
    20240901_092428.jpg
    3.5 MB · Views: 12
Last few days I have been looking at this thing and been considering leaving this logo I built off the truck. Keep it cleaner and not too busy.
 

Attachments

  • 20240901_093359.jpg
    20240901_093359.jpg
    3.9 MB · Views: 7
I have that sloping panel coming from the back window down behind the rear seats. That will most likely get dynamatted and then carpeted. Maybe cut the shop logo larger than this small one and mount it there. Black carpet and paint it bronze.
 

Attachments

  • 20240901_094326.jpg
    20240901_094326.jpg
    3.5 MB · Views: 7
  • 20240901_094415.jpg
    20240901_094415.jpg
    3.6 MB · Views: 7
Have you looked into the Powermaster starters at all?
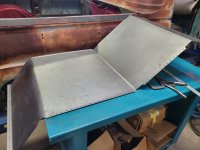
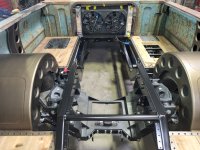
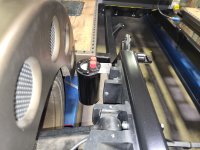
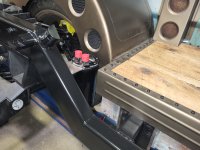
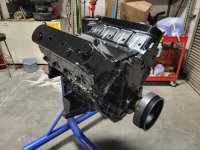
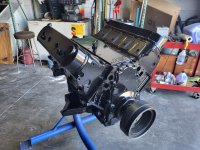
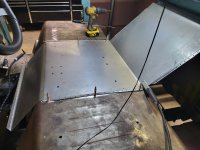
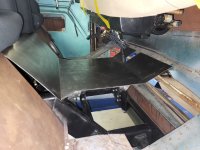
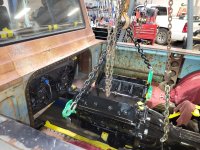
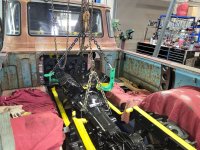
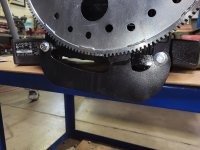
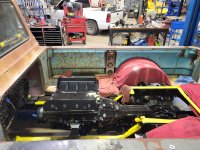
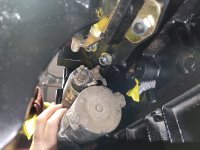
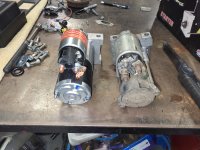
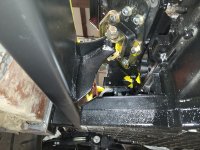
I have a new one in the box laying there and did try it today. Didn't seem to fit too well. Also I had to drop it in from the top whereas the other starters go in from the bottom. With that batwing oil pan there is not much space there.
 
About $1000 more than the scissor lift but this looks WAY better. Each post has 5 anchor bolts that are removable. I would leave one post bolted down all the time and put one against the wall. Then you can actually get to the whole vehicle underneath. Pretty excited about this one.
 
Back
Top