- Thread starter
- #81
ranman5608
Well-known member
- Jan 23, 2023
- 190
- 265
Well gentlemen here we go again.
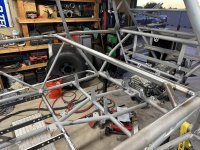
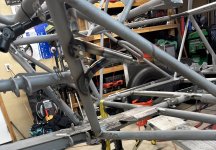
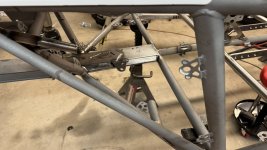
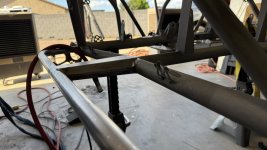
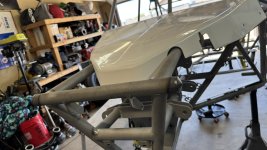
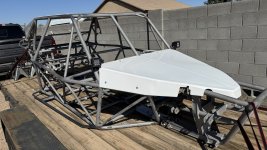
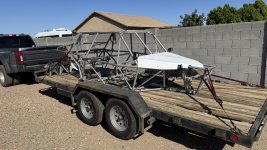
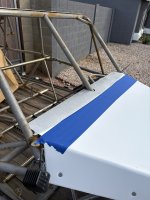
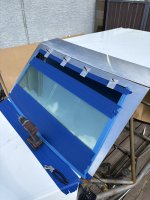
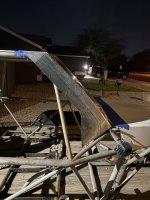
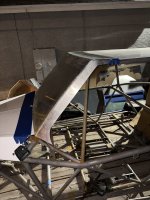
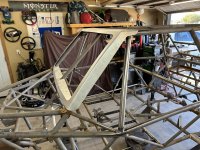
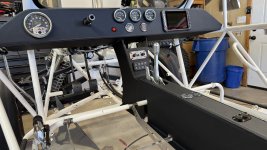
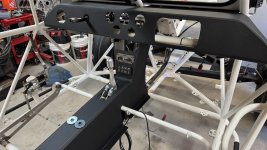
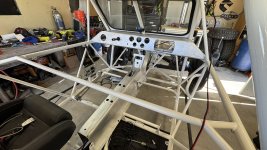
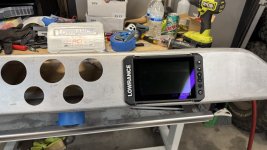
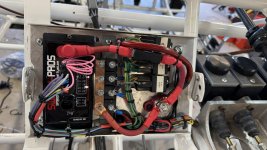
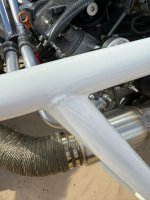
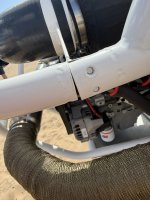
Last trip of the season didn't go as well as one would hope. After about a week of heavy winds the dunes were absolutely perfect and un touched. But with that comes some dangers that require a higher level of attention. Well one of those dangers got us. While cruising around at a moderate pace we came to a seemingly smooth bowl transition that turned out to be a sheer drop nothing super crazy and the car soaked it up well but it was enough to slap the ass of the car down onto a little hump in the dune which wound up bending the removable engine cage section (as seen in the pictures below) luckily it was easily repairable by swapping out the top tube. Another thing I wanted to accomplish in this off season was redoing the dash and console. so i rearranged the gauges, upgraded the GPS, and added a switch pro to modernize the wiring in the car. the dash and console came out amazing wrapped in vinyl to match the new seats.
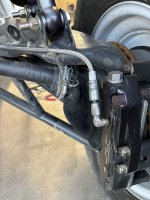
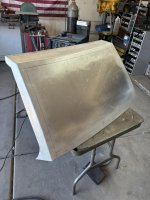
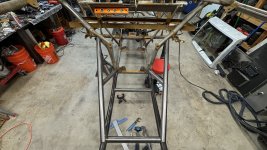
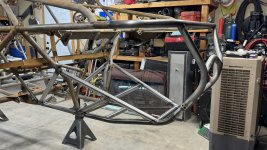
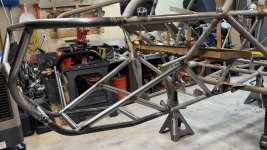
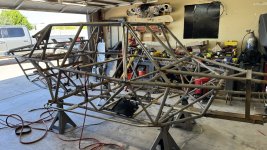
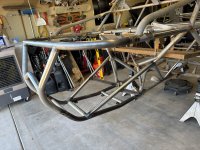
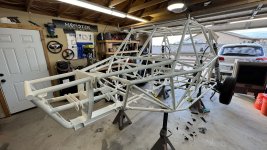
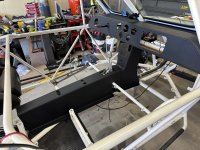
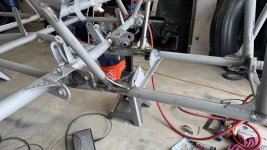
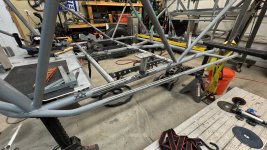
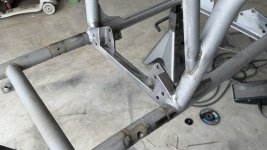
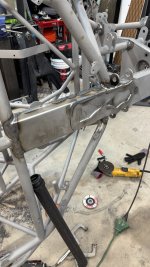
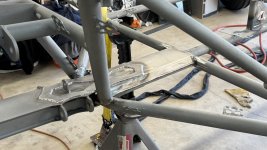
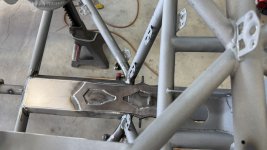
while doing a thorough inspection I found some stress cracks in a couple support tube connections around the transaxle so instead of doing the repair and touching up the paint which looks terrible on a white car i decided to tear it down completely and start the process over again. I have made a new list of things i wanted to adjust as well so those will get done while the car is down. the new list is as follows.
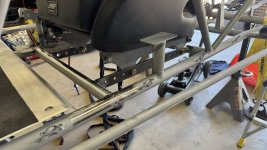
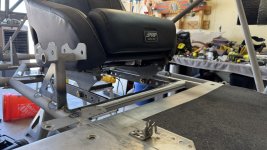
1.new front seat mounts. for adjustability these are a 2 piece design so angles and locations can be configured how ever the driver desires. somewhat futureproofing this thing.
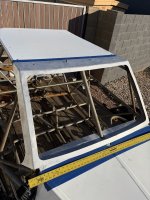
2. new radius windshield. new tabs would need to be welded to frame.
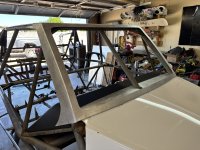
3. adding a few gussets around the back half
4. tie in front bulk head to bottom of chassis better spreading the load. this isn't a major issue but in my experience it could be stronger.
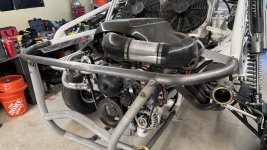
5. relocating transmission rear mount from closest to the bell housing to the opposite side of the mount this way the gearbox will be much easier to remove for services. the gearbox is currently wedged between the front and rear mount and there is very little room to pull this thing out without damaging the coating.
Last trip of the season didn't go as well as one would hope. After about a week of heavy winds the dunes were absolutely perfect and un touched. But with that comes some dangers that require a higher level of attention. Well one of those dangers got us. While cruising around at a moderate pace we came to a seemingly smooth bowl transition that turned out to be a sheer drop nothing super crazy and the car soaked it up well but it was enough to slap the ass of the car down onto a little hump in the dune which wound up bending the removable engine cage section (as seen in the pictures below) luckily it was easily repairable by swapping out the top tube. Another thing I wanted to accomplish in this off season was redoing the dash and console. so i rearranged the gauges, upgraded the GPS, and added a switch pro to modernize the wiring in the car. the dash and console came out amazing wrapped in vinyl to match the new seats.
while doing a thorough inspection I found some stress cracks in a couple support tube connections around the transaxle so instead of doing the repair and touching up the paint which looks terrible on a white car i decided to tear it down completely and start the process over again. I have made a new list of things i wanted to adjust as well so those will get done while the car is down. the new list is as follows.
1.new front seat mounts. for adjustability these are a 2 piece design so angles and locations can be configured how ever the driver desires. somewhat futureproofing this thing.
2. new radius windshield. new tabs would need to be welded to frame.
3. adding a few gussets around the back half
4. tie in front bulk head to bottom of chassis better spreading the load. this isn't a major issue but in my experience it could be stronger.
5. relocating transmission rear mount from closest to the bell housing to the opposite side of the mount this way the gearbox will be much easier to remove for services. the gearbox is currently wedged between the front and rear mount and there is very little room to pull this thing out without damaging the coating.
Attachments
-
 IMG_1251.JPEG1.1 MB · Views: 87
 -
 IMG_1134.JPEG850.5 KB · Views: 86
 -
 IMG_1130.JPEG904.7 KB · Views: 81
 -
 IMG_1126.JPEG1 MB · Views: 83
 -
 IMG_1121.JPEG1.1 MB · Views: 80
 -
 IMG_1067.JPEG879.5 KB · Views: 81
 -
 IMG_1040.JPEG1.1 MB · Views: 81
 -
 IMG_1020.JPEG773.2 KB · Views: 88
 -
 IMG_1006.JPEG775.6 KB · Views: 87
 -
 IMG_1002.JPEG715.1 KB · Views: 87
 -
 IMG_2474.JPEG799.5 KB · Views: 78
 -
 IMG_2475.JPEG519.3 KB · Views: 79
 -
 IMG_2476.JPEG566.3 KB · Views: 78
 -
 IMG_2477.JPEG537.2 KB · Views: 77
 -
 IMG_2478.JPEG692 KB · Views: 81
 -
 IMG_0954.JPEG945 KB · Views: 90


 .
.