acefuture
Well-known member
- Jun 8, 2021
- 365
- 604
Thought I'd share some photos of this repair I just knocked out. I just recently moved into a new storage yard near my house and it's a tight squeeze. The first day moving in, the space the front desk gave me was technically 2 spaces, but was just large enough for 1. Luckily they guy who was parked the other side of me showed up as I unhooked. But when I went to rehook, he parked in a way that blocked me from rehooking, but since the gate was closed, I just decided to go for it as is. I was looking out my passenger side rear view and crunch, on my driver side my tailgate went right into the motorhome on the other side. Major bummer. I got the owners number and gave him a call and let him know that I am very familiar with fiberglass work since I build boats as a hobby. He graciously allowed me to take a stab at the repair. Over the last few days I knocked it out. Happy with how it came out.
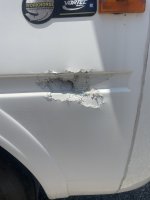
When the damage happened. I got really lucky that this rig didn't have a custom paint job and the gelcoat was heavily oxidized.
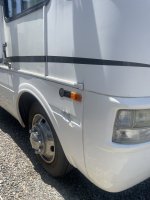
First step was to pull a mold to recreate the curves. I laid some trash bags down over the section, laid up 4 layers of 1.5oz CSM and taped down some aluminum runners to hug the curves. In hindsight I wish I would have vacuum bagged it, or used clay instead. But I was working on a time crunch and didn't have those materials.
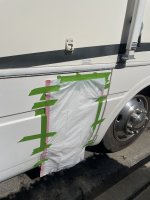
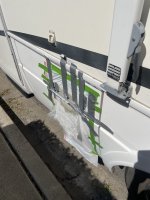
I cut the damaged section out and sanded around the area
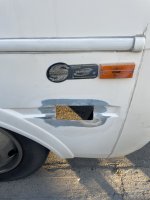
Bonded the mold using a custom kitty hair style mixture to the backside and filled it using kitty har and some 12oz glass
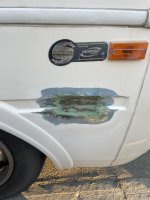
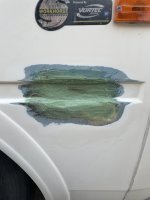
Over the top I bonded the section in with 5 layers of 12oz glass and topped with 1.5oz chop strand for sanding.
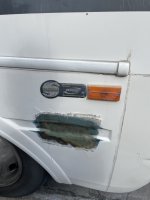
Then hours and hours of sanding to get it back to an acceptable surface
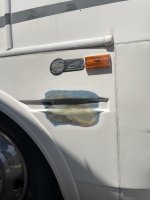
Came back over it using kitty hair as filler. I really don't like using bondo on applications that will see any water, so this mixture with poly based resin, with tons of chopped glass to create the thickness. I had some microballons I was going to add, but I really liked the consistency and strength without it. Pic below is once it was just about faired out. I added on more topcoat of fairing to get the low spot out.
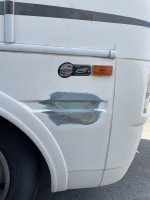
Laid a guide coat of gelcoat to see where the low spots were. Sanded it, and did a tad more fairing.
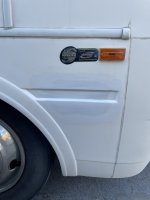
Rolled and tipped 5 more layers of gelcoat to build up the surface for sanding.
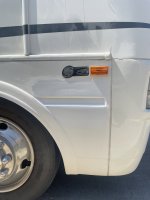
Sanded with 220, then 400, then wetsand 500, and wetsand 1500
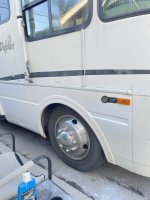
And here is the final repair with buff and polish. Used Meguiars 49 for cutting and 59 for polish. Came out fantastic. I warned him that colormatching was going to be next to impossible. The quarter panel has a gradient fade from rear to front from the sun. So I pulled the color sample from the rear of the panel, so hopefully it will fade over time to more closely match. I told him if it doesn't fade enough over the season to come, to bring it back and i'll paint the whole quarter panel to match the one to the left of it. All in all we were both very happy with the results. Hopefully won't have to do another one of those for a long time...
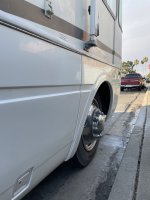
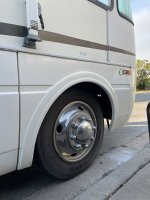
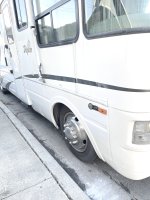
When the damage happened. I got really lucky that this rig didn't have a custom paint job and the gelcoat was heavily oxidized.


First step was to pull a mold to recreate the curves. I laid some trash bags down over the section, laid up 4 layers of 1.5oz CSM and taped down some aluminum runners to hug the curves. In hindsight I wish I would have vacuum bagged it, or used clay instead. But I was working on a time crunch and didn't have those materials.


I cut the damaged section out and sanded around the area

Bonded the mold using a custom kitty hair style mixture to the backside and filled it using kitty har and some 12oz glass


Over the top I bonded the section in with 5 layers of 12oz glass and topped with 1.5oz chop strand for sanding.

Then hours and hours of sanding to get it back to an acceptable surface

Came back over it using kitty hair as filler. I really don't like using bondo on applications that will see any water, so this mixture with poly based resin, with tons of chopped glass to create the thickness. I had some microballons I was going to add, but I really liked the consistency and strength without it. Pic below is once it was just about faired out. I added on more topcoat of fairing to get the low spot out.

Laid a guide coat of gelcoat to see where the low spots were. Sanded it, and did a tad more fairing.

Rolled and tipped 5 more layers of gelcoat to build up the surface for sanding.

Sanded with 220, then 400, then wetsand 500, and wetsand 1500

And here is the final repair with buff and polish. Used Meguiars 49 for cutting and 59 for polish. Came out fantastic. I warned him that colormatching was going to be next to impossible. The quarter panel has a gradient fade from rear to front from the sun. So I pulled the color sample from the rear of the panel, so hopefully it will fade over time to more closely match. I told him if it doesn't fade enough over the season to come, to bring it back and i'll paint the whole quarter panel to match the one to the left of it. All in all we were both very happy with the results. Hopefully won't have to do another one of those for a long time...


