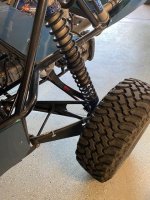
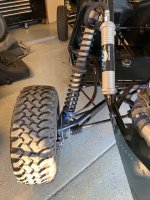
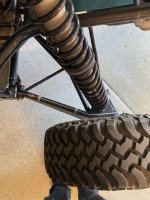
Need help with getting the correct dual rate spring set up in rear

Jammer75

Well-known member
Joined
May 5, 2021
Messages
439
Reaction score
377
Current set up

4 seater 2.0 Subaru 

Fox 2.5 Coil over Remote Reservoir

16" stroke (only using 10.5" of stroke) 7/8" shaft

springs were checked and are as follows

Bottom spring 16"  363lbs

Top Spring 14" 288lbs

1" preload

150psi in reservoirs 

After gradually going up on the comp/rebound this is where i ended up and still bottom out and kick

Comp valving #95                               Rebound Valving #85

1.8               2x0.010                             1.6         0.012

0.095          0.01 (flutter)                     1.425     0.015

1.6              2x0.010                             1.35       0.015            

1.425         0.015                                  1.1           0.015

1.35           0.015                                  .095        0.015

1.1              0.015                                 0.8            0.015

0.95          0.015                                 Back up .750     0.2

0.8            0.02

Top Out  1.570      0.128

What I know

Fox 2.5 Coil over Remote Reservoir 16" 7/8" shaft

corner weight is 758lbs

distance from swingarm pivot bolt to wheel center bolt is 25"

distance from swingarm pivot bolt to lower shock mount is 21"

amount of shock shaft showing at full droop is 10.5-11"

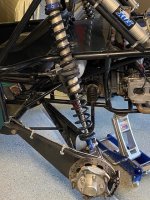
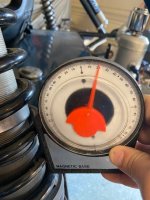
shock angle is 20 degrees

rear sand tire weighs 47lbs

I feel this thing is under sprung- 

not sure what would be the best and what is a good amount of droop%
IMG_0690.jpg

IMG_0689.jpg

IMG_0688.jpg

IMG_0686.jpg

IMG_0665.jpg

IMG_0687.jpg

 
Last edited by a moderator:
One thing I see is, when car is sitting, where it looks like your cross over is you are not using much of your upper spring.

 
One thing I see is, when car is sitting, where it looks like your cross over is you are not using much of your upper spring.
But if I put the crossover ring up higher then I just bottom them out quicker and more often…?

 
Last edited by a moderator:
That rate does seem pretty light for the corner weight, especially if you have rear passengers.  I'm running 350/300 on my 2-seater buggy at 500lbs/corner.  That's with a 0.9:1 motion ratio, so 315/270-ish wheel rate.

Even still, to get it to not just pack up and quit everywhere, I was running similar valving to you and it would bottom and kick most runs until I got bypasses if we were getting it, so it is what it is.  With bypasses, out duning I will still bottom (use what you paid for and all) but it never kicks back afterwards since it's full valving at that point in the travel.
I do have 2 girls that ride back there. So probably add 100 lbs to each rear corner….

 
BTW, your shock angle is calculated at full bump relative to the arm.  Quick drawing looks like it's about as close to 90* as you can get, so when using a calc, you input "0" on most of them.   

 
Mine is also a 2seat and rear wheel weights of 554/552. I'm using 350/300 on it so agree with Rockwood yours seem a little light. I did run my cross overs low like you and for the same reason. My thought was stop upper and use lower for more support. I had shocks tuned and, they moved them up. My cross overs are set to stop just prior to upper spring coil bind.

 
Mine is also a 2seat and rear wheel weights of 554/552. I'm using 350/300 on it so agree with Rockwood yours seem a little light. I did run my cross overs low like you and for the same reason. My thought was stop upper and use lower for more support. I had shocks tuned and, they moved them up. My cross overs are set to stop just prior to upper spring coil bind.
Yeah,I can after reading it a few more times on how to figure out where my crossovers should be. But gotta start with the springs being correct. I understand all the adjustments for the most part and not changing a bunch of things at once. 

 
You are going to have a fight with a single that shock location IMO. Going to be harsh once you find the right set up to avoid g-outs and kick. 

Couple of thoughts;

Rebound: do you have all the bleed screws open? I assume yes, and your piston speed is low (shock location and angle) so you are not getting full use of the rebound valving since it's flowing through the bleed. If you go to full 20's on the rebound and still kick then close a bleed hole. 

If you add spring and don't fix the kick you will... kick worse. 

Compression: Seems like a lot of bleed. Probably rides nice. 0.095' x 0.010' lets that guy open up a lot. Then you have light valving before and after the flutter so you are getting a tiny amount of low speed control. And with your shock location and angle g-outs are going to be in that low speed area.

More spring will help but see the rebound issue first...

I'd try something like (forgive me if I don't get the diameters perfect... these are my King memorized diameters your measured values don't seem to be a clean pyramid)

-------- 15 x 1.75

------ 12 x 1.60

- 10 x 1.15

--------- 15 x 1.75

------- 15 x 1.60

---- 12 x 1.45

-- 12 x 1.30

- 12 x 1.15

- 12 x 1.0

If you close a bleed screw to fix the kicking then increase the flutter to allow some more flow (1.0" x 0.010")


So something like this for rebound


1.6


0.020


1.425


0.020


1.35


0.020


1.1


0.020


0.95


0.020


0.8


0.020


Back up .750


0.2


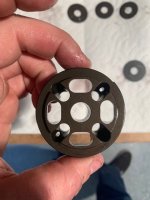
See pic of piston last time I had it apart as far as what is seeing for the bleed holes

IMG_8289.jpg

 
This is what I'm coming up with on the calculator

foa.PNG

 
You have 1" of preload now to maintain ride height, correct?  That's a 75% increase in rate and seems way high to me.  You're gonna have to run short springs to get it to ride height with some preload.
I did 1" just cause (I've heard you shouldn't go/or have to go much more than that).

75% meaning that for example - a 100lbs spring compressed 1" would have a rate of 175lbs? so on my 363lbs (lower) and 288lbs (upper) would have a rate of 1139.25lbs or am I backwards or not doing this right...?

I'm not sure what length effects on it. shorter has a higher rate..?

 
So something like this for rebound


1.6


0.020


1.425


0.020


1.35


0.020


1.1


0.020


0.95


0.020


0.8


0.020


Back up .750


0.2


See pic of piston last time I had it apart as far as what is seeing for the bleed holes

View attachment 25356
Yep, that should slow you down on the rebound. Those are some big bleed holes but it would be getting pretty exotic to try and play with those.  

 
I did 1" just cause (I've heard you shouldn't go/or have to go much more than that).

75% meaning that for example - a 100lbs spring compressed 1" would have a rate of 175lbs? so on my 363lbs (lower) and 288lbs (upper) would have a rate of 1139.25lbs or am I backwards or not doing this right...?

I'm not sure what length effects on it. shorter has a higher rate..?
No! the 75% increase is the numbers you put in for your spring rates on the calculator. Take some time and watch all of the videos on Crawlpedia. There is a ton of education in there. If you have a 350 top and 350 bottom your actual spring rate is 175

 
Last edited by a moderator:
Lots of confusing math when trying to figure out spring rates and shock valving. I am certainly not an expert even or novice for that matter. 

I would suggest finding the proper spring rate first. The proper spring rate will support the weight of the car at ride height and allow the suspension to travel through the range. The calculations for dual rate coils causes a ton of confusion for a lot of people. A spring with a rate of 350lbs means that it takes 350 pounds to compress said spring every inch. 350lbs for 1" of travel, 700lbs for 2" of travel, 1050lbs for 3" of travel etc. etc. When you stack 2 - 350lbs springs the rate is cut in half as you are only compressing each spring 1/2" per total inch of movement in the spring stack. 175lbs for 1" of travel. 350lbs for 2" of travel 525lbs for 3" of travel. Now you must also take into consideration the amount of droop or down travel you have as that needs to be factored into your spring rate for each inch of travel. With a dual rate set-up you have the ability to mix upper and lower weight springs to achieve a more precise primary spring rate, but you also need a heavy enough bottom spring to take over on big g-outs. Probably clear as mud now.... Hope this helps a little

 
Last edited by a moderator:
I did 1" just cause (I've heard you shouldn't go/or have to go much more than that).

75% meaning that for example - a 100lbs spring compressed 1" would have a rate of 175lbs? so on my 363lbs (lower) and 288lbs (upper) would have a rate of 1139.25lbs or am I backwards or not doing this right...?

I'm not sure what length effects on it. shorter has a higher rate..?
Your combined rate is 160 now, and the calculator’s combined rate is 273. :biggrin:

 
Current set up

4 seater 2.0 Subaru 

Fox 2.5 Coil over Remote Reservoir

16" stroke (only using 10.5" of stroke) 7/8" shaft

springs were checked and are as follows

Bottom spring 16"  363lbs

Top Spring 14" 288lbs

1" preload

150psi in reservoirs 

After gradually going up on the comp/rebound this is where i ended up and still bottom out and kick

Comp valving #95                               Rebound Valving #85

1.8               2x0.010                             1.6         0.012

0.095          0.01 (flutter)                     1.425     0.015

1.6              2x0.010                             1.35       0.015            

1.425         0.015                                  1.1           0.015

1.35           0.015                                  .095        0.015

1.1              0.015                                 0.8            0.015

0.95          0.015                                 Back up .750     0.2

0.8            0.02

Top Out  1.570      0.128

What I know

Fox 2.5 Coil over Remote Reservoir 16" 7/8" shaft

corner weight is 758lbs

distance from swingarm pivot bolt to wheel center bolt is 25"

distance from swingarm pivot bolt to lower shock mount is 21"

amount of shock shaft showing at full droop is 10.5-11"

shock angle is 20 degrees

rear sand tire weighs 47lbs

I feel this thing is under sprung- 

not sure what would be the best and what is a good amount of droop%
View attachment 25334

View attachment 25335

View attachment 25336

View attachment 25337

View attachment 25338

View attachment 25339
Your springs are much lighter than mine.  My rear corner weight is around 650 lbs and I am running 300 over 500 lb springs.  I copied this spring rate calculator from this site years ago.  You might try running thru the calculations and see what you get.  Mine rides a little rough but it handles really well.   I do not have bypasses or a flutter stack yet.  

Buggy spring rates and shock tuning


First off, a lot of people have the misconception that you find your combined spring rate in a dual-rate coil-over setup by adding the two spring rates (rated in pounds-per-inch) and dividing by two. This is not at all how you figure that out and will get you a number that is way off. Luckily though it's pretty simple. To figure out your combined spring rate, the formula is "S1xS2/S1+S2" where S1 equals one of the spring's advertised rate and S2 is the other spring's rate. For example, a 200 pound spring over a 300 pound spring you would figure out as follows: 200x300 divided by 200+300. This gives us 60,000 divided by 500, which equals 120lb./in. combined spring rate. That sounds low until you consider that the springs get 120 pounds stiffer every inch they compress.

So now you have figured out what your car or truck currently has on it, but how do you know what it should be? This gets a little more complicated but isn't that hard if you take it step by step. The primary calculation is figuring wheel rate (WR). Lets simplify it by focusing on one corner of an A-arm front suspension. You will need the sprung weight (SW) of that corner of the car, which can only be accurately found by using four race car scales, one under each tire. If you have not weighed your car in this fashion you will have to take an educated guess (not advised, if you're going to try to figure this out, take the time to get your car weighed). For the purposes of this article let's assume that this one front tire has 500 pounds of weight on it. The only other number you need is total wheel travel (WT). Let's say it's 20 inches. With these numbers written down you can plug them into the formula, which is WR=SW divided by 0.4xWT. So we have 500 divided by 0.4x20. This works out to 500 divided by 8, which equals 62.5. This is your wheel rate, which doesn't mean much at all until we do a couple more calculations.

The next step is figuring the motion ratio (MR), which is the ratio of leverage put on the shock depending on where it is mounted on the A-arm. The first thing you do is measure from the lower A-arm pivot point on the chassis to the lower shock mount bolt hole. This we'll call D1 for distance one. Then measure from the same lower A-arm pivot point on the chassis to the outer spindle pivot point. Basically the whole length of the lower A-arm from pivot point to pivot point. This we'll call D2 for distance two. The formula used for motion ratio is D1 divided by D2, then squared. So let's say D1=20 and D2=25. This would be 20/25, or 0.8. Now we square 0.8 (0.8x0.8), which equals 0.64. Note that if you are figuring out the MR of a rear trailing arm suspension, the measurements are: from pivot point to shock mount, and from pivot point to wheel centerline).

There's one more step before the final calculation. This is measuring the angle that your shock sits at as measured from vertical. You can get a cheap angle finder at most hardware stores to help figure this out. Once you know the angle you can figure out the angle correction factor, or ACF. For this you will need a scientific calculator, which most home computers have built in. The formula is the Cosine of the angle. So just type in the number of the angle and hit the Cosine button on the calculator. For this article we'll say the shock is at a 10 degree angle. I punch 10 into the calculator, hit Cosine, and it spits out 0.985. This is the angle correction factor.

It's now the moment of truth, to see what the spring rate "should" be and compare it to what is on the car. The final spring rate (SR) calculation is this: WR divided by MRxACF. We already figured out all of these numbers so we just plug them in. This is 62.5 divided by 0.64x0.985, which works out to 62.5 divided by 0.63, and finally, 62.5/0.63 equals 99.2. This is our final spring rate number. Now if you compare it the first calculation we did with the 200 over 300 pound springs, you can see that those springs are stiffer than needed because they work out to a combined spring rate of 120 pounds per inch. To get the actual combined spring rate closer to the 99.2 that it should be one or both of the springs will need to be changed. It's cheaper to buy only one set of springs so we'll try to figure out what combination will work using either the existing 200lb./in. or the 300lb./in. springs. Going back to that first S1xS2/S1+S2 formula and plugging in a few numbers, I see that 200 over 200 works out to exactly 100lbs./in, and so does 150 over 300. Given the choice it's my opinion that it's better to run the 150 over 300 because the 150lb./in. spring will give a nice soft ride in the initial several inches of travel while the 300lb./in spring will resist bottoming out a lot better than if we ran the 200 over 200 combo.

That's all there is to it folks. But again, I would like to stress that for these calculations to work, you REALLY need to weigh your car on scales that give accurate individual wheel weights. If you guess, it's only that, a guess, and you could spend money on the wrong springs, which of course you don't want to do.

 ​

I often get asked "what’s wrong with my shocks" by people who are frustrated with the ride of their car and just need some help. I have also seen many people ask questions on this board about this subject and so I thought it may be a good idea to list the things I would do to get a good riding car from start to finish. Remember this is a generality as well as just my .02 so use it if you like or don't if you disagree.

Ok, here we go. This could be long but it will help. The order in which you should proceed is spring first, valveing second and rate nuts last. (Rate nuts being the aluminum collars inside the spring threaded on the shock body)

Springs: The preferred spring rates for most cars will require 1" to 2" preload to get the desired ride height for your car. With the suspension extended (car jacked up off the ground) loosen the upper spring collar that controls pre-load. You want it to loosen up to the point that the coil springs become loose enough to rattle on the shock. Now tighten the preload collar a turn or so until the springs are just held in place and can't rattle around much. This is ZERO preload for your application. Depending on the spring heights being used there can be any where from 0 threads showing on the shock body above the preload collar to 4 inches showing. What ever it is, measure from the preload collar to the top of the shock, shock bolt, top of the threads, what ever is a constant so that you know what 0 preload is for later. If you have 4" of threads showing or 0 threads you need to change the height or length of the springs to correct this but we won't go into that right now. Now that you have a starting point, thread the preload collar down the shock until you get the ride height that you want in your car. This must be done with nitrogen in the shocks and preferably an average load in the car. This may take a few attempts with the jack and don't forget to settle the suspension a bit by jumping up and down on it or rolling the car back and forth. If you have the ride height you want but have less than 1" of pre-load then chances are that you have too much spring rate. If you have more than 2" of preload then you have too little spring rate. It is better to go to the light side (3" preload) than it is to go to the stiff side when it comes to spring. If you are running two springs (upper and lower per shock) then it is a good idea to change spring rates between them. Always go lighter on the top and heavier on the bottom. This way the car can enjoy the plush ride that a light spring can help with and also get a stiffer rate when the secondary rate nuts come into play for those big G outs. I don't think it is a good idea to have MORE than 200lbs difference between the upper and lower spring rates(400 upper and 600lb lower for instance) because more than that tends to be something you can feel considerably as the suspension cycles. As you transition from the upper spring to the lower it may be more of a jarring feeling than a smooth one. Remember that if you need more or less spring on your car you may be able to just change the upper one way or the other to get the rate you need. Also, never raise your car or lower the pre load collar in an effort to stiffen up compression. That is the shocks job.

I know this is out of order but since you are playing with springs and may have them off the car now is the best time to measure them for secondary rate nut placement later. Every shock and spring set up is different. The correct way to set the rate nut is to figure out how tall the lower spring is at full compression. Most cars will bottom on the bypass (or should) not the coil over so the right way to check this is to take the springs off the car and let the suspension compress to full bottom. Here you can measure the coil over length from the lower spring plate upwards. This will be important soon. Now, figure out the total length of the lower spring if it were compressed to bind. You can do this by adding up the thickness of the individual coils multiplied by the total number of them to get total spring height compressed. Now add the height of the spring divider. Add that to the lower spring perch measurement you got by compressing the suspension and you now have the lowest possible setting for a secondary rate nut with out binding the spring and shattering the spring divider. As long as you don't go below this number you can play with the position of the rate nuts to see what works for you. Remember compressed lower spring height plus spring divider added to the position of the lower spring perch at suspension compression gives you the lowest point at which you can run a rate nut (from spring perch upward) with out problems. This should be the last thing you adjust when doing suspension. Every thing else is first. In order from start to finish, spring rates correct (1-2 inches of pre-load to get the ride height you want. Less than an inch you have too much rate, more than 2 inches you have too little rate) next valveing, compression and rebound to get the ride the best you can, last, secondary rate nuts to help with the G outs. If you have bypasses then a rate nut is less important to you if the valveing is correct. If you have coil over only then the rate nuts will be a considerable improvement for you.

Valveing: Once the springs are close the next thing to do is adjust the shocks. For the sake of typing, I am going to assume you have bypass shocks so the adjusting of them is easy to do. All of these things apply to a coil over (accept bump stage) but you have to take a coil over apart to change valveing where a bypass can be done externally as long as the internal valveing is close. For the sake of definitions, more compression means more compression resistance, or slower compression of the suspension or a stiffer ride. Less compression means less resistance, or faster compression of the suspension or softer ride. More rebound means more rebound resistance, or slower extension of the suspension. Less rebound means less resistance to the extension of you suspension, faster tire extension. There are many ways to adjust suspension and all work but what "I" like to do is to start with the shocks as loose as possible. Set your compression and rebound adjusters all the way out or as loose as they can be. Next, run the whoops. Try them at 20 mph and slowly run up to 60mph. If you have some experience with this then you can feel what the suspension is doing but if not then the best thing is to watch the car from another car or video a section of whoops at different speeds and play it back in slow motion. If your compression is too loose it still rides great in the whoops. If compression is still too stiff the chassis will rise up with each jarring hit of a whoop. The goal is to have compression loose enough to allow the suspension to compress over the whoops without causing the chassis to rise up with each hit. Use some common sense here since a huge whoop can hit pretty good no matter what you do. I then stiffen compression until the chassis starts to "shock" upward and then back off a bit. If the rebound is too loose then it will still ride good in the whoops unless it is WAY too loose in which case the car will rise upward shortly after you hit a whoop. I know this sounds the same as stiff compression but they are different. If compression is stiff and moves the car you will feel jarred by the front side of the whoop as you go over it. If it is a rebound issue then the front of the whoop feels fine but after that the chassis raises up smoothly without any jarring affect. Another way to tell is if the chassis bobbing around stops when you get into the throttle, probably loose rebound. If there is too much rebound then the engine will rap up in rpm between each whoop since the tire isn't allowed to extend fast enough to keep contact with the ground. Again, video is easiest when doing this so try it and see how you do.
Next, G outs and final rebound adjustments. Once you are happy with the whoops then move on to some G outs. If you have a 3 tube or more bypass then the shortest compression tube is the closest thing you will have to a G out adjustment. Hit a few G outs and if the car tends to bottom out during what you would consider to be normal dunning for YOU then stiffen the short tube adjustment a turn or two at a time until your G outs become livable. Remember that every car can be bottomed out if you like so keep this at the level you intend to run the car. If you still can bottom the car with ease even with the short tube all the way tight then try the secondary rate nuts. If you can get the ride you like without using up all the short tube adjustments then great! Try the rate nuts also and just loosen your short tube adjustment to get a smoother ride in other places. If you have a two tube bypass then you may want to try the rate nuts first and if they are not enough then you have to stiffen you main compression tube to help out in the G out. This also sacrifices your whoop ride to stiffen only as much as you can stand it. If you don't have a bypass shock then you have no bump stage to speak of so your only adjustment in a G out are the rate nuts. Now go find a jump somewhere you are happy with and jump it. If your car hits the landing and sticks, then great. But if your car hits the landing and then bounces up a time or two you need more rebound. Stiffen it up and try it again. Personally, I like to have as little rebound as possible just short of having a car that bounces up a second time on jump landings. This will keep the tire on the ground the most and save trannies and CV's. Also, run the air pressure you intend to use mostly when doing these adjustments. I like to have a lot in my tires, 16-18lbs and let the suspension do its job not the tire sidewall. Variable tire pressures will affect both compression and rebound so keep it consistent. If you can't get your adjustments to go far enough one way or the other then your next step is the valve stack in the shock. Stiffen or loosen the stack just as a coil over guy would do and then start your testing over again. Bypass adjusters allow you to adjust a certain range of what the valve stack is set up to do. If you are out of this range then changing the stack will move your adjustable range one way or the other.

This description of shock tuning is a simple one. There are many other variables to consider that, simply put, would take too long to type. Free bleed, bypass valve porting, flow restrictions, shaft speeds relative to hydraulic flow potential, reversion, nitrogen temperatures, unsprung weight, and CHASSIS DESIGN to name a few. Assuming that all of these things aren't affecting you in a negative way then following these steps should get you really close to a nice riding car. Good luck guys. Justin at Revenge Racing


Last edited by a moderator:
Back
Top