Basic 120v welder advice por favor

wopachop

Well-known member
Joined
May 5, 2021
Messages
906
Reaction score
374
I havnt done much welding. Please teach me anything you find relevant. Even if it seems simple and obvious, it might be new to me. 

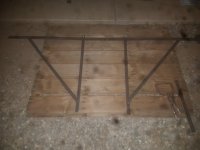
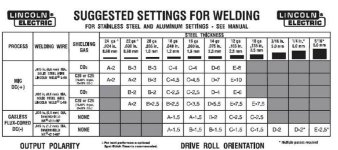
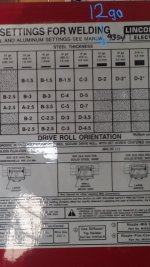
Want to turn this bedframe into a television mount. It measures to be 0.100" thick so im guessing that is 12 gauge according to the chart on the welder. 

Pretty sure i have 0.023" wire in there and its the 75% argon mix. According to the chart 14 gauge is the thickest it recommends. I know it can go thicker because we used it to weld a U shape piece of rebar onto a chunk of metal that must be 1/2" thick. Im looking for advice you might have when using smaller 120v welders to do thicker stuff. 

I have a bunch of questions but will try to keep it short. 

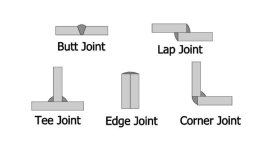
1. When i lay a piece of 0.100" metal perpendicular to another identical piece and then weld a bead along the side how do you calculate the thickness for the welding chart? Its not a butt joint so the metal is no longer 0.100" in total. But im welding along the side so its also not doubled to 0.200". 

2. What settings would you choose for the welder posted and the metal is 0.100" thick? 
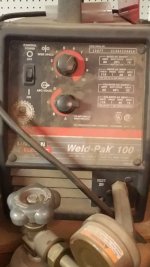
Screenshot_20220802-202934_Gallery.jpg

20220802_203218.jpg

 
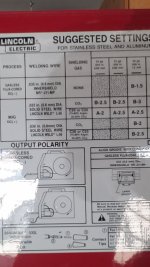
If you open the side lid it should give you some baseline settings for the wire speed and temp. I usually weld a little hotter than the recommended setting. Also make sure to clean the are that your going to weld on by getting the mile scale off. 

779C3244-E1DD-471E-A7CC-A4B825C1463C.jpeg

 
Preheating with a torch will help. The real drawback to budget wire feed welders is the drive system for the wire. So i wouldn't put much faith in the chart. Especially when you are already welding thicker than its scale. If it were me. I’d set it to max power then given that its really thin wire, run the wire speed up to near where the last setting on the chart is. If its popping its its to much wire. The sound you want is a steady zzzzzzzzzzz. Should sound like sizzling bacon. 

Fyi mig mix is way overkill for that welder and a big waste of money. Straight co2 up to 200 amps is acceptable

Preheat. It makes a huge difference with what you are working with

 
Some good advice already given. Practice on some similar scrap is what I would echo. Turn the voltage way down and see what it does. Turn the wire feed way down and see what it does. The settings on the lid will give you a good baseline and turning down both inputs to the extreme will show you what not to do. It's important to know what not to do also. Weldtube and some of the other welding channels on youtube can show you a basic pattern to use when running a bead but it takes time to make a nice looking weld bead. I started out on a similar machine just welding. I sucked. I would have learned much faster with a teacher but I did ok. I can't pass a real welding test but I can run a decent bead and definitely can stick two pieces of mild steel together. On my little hobart, I ran voltage all the way up and wire speed pretty close to it. It does OK. Only till I started running a much more powerful 480 machine at work did I see how much harder using the little guy was to get clean looking welds. 

 
Like Sausage said: if it's popping, too much wire speed, if it feels like you're dripping into the puddle, too slow. If you have to stop because it's making holes, too much voltage, if it's piling up and not easily melting into the parent metal, too little voltage.

Make sure to look at the puddle and not the arc, especially the edges on a lap joint: you want to see the edge of the puddle touch, but not go over, the corner of the piece of steel on top.  Cursive e pattern is the easiest to get to look good.  Time the "e" so that it juuuuuuust touches the corner, then dwell at the bottom of the "e" the same amount of time to balance it.  Sounds dumb, but I used to say "tick-tock" to myself like a metronome to get the timing/rhythm right.

Cut your wire stickout to a consistent length until you get the hang of things.  This gives you a reference point for each weld to start.  One of the most frustrating things about learning to weld and adjusting settings is if you go from 1/2" of stickout to 3/4" (which isn't that much), you'll decrease the effective current at the weld and throw any adjustments right out the window.

Try to keep your hand positioning consistent (including your off hand) and practice the weld without pulling the trigger or dropping the mask end to end to find problems before you start gluing.  I prefer using a MIG glove in my off hand since it's generally resting on the hot ass workpiece and a TIG glove on my torch hand since it's less exposed, has better feel, and can actually manipulate items easily. 

 
Last edited by a moderator:
Good stuff thanks. Will clean the metal nice. Just got a $10 butane torch thats been fun to cook with. Roughly how hot would you preheat the metal? 

I was taught to do little quarter moon shapes. Are you adding the cursive e shape at each end?

edit: i looked up some quick images. If im doing a lap joint i want to top of the E to touch the side, but not go over? During the backstroke i will melt the edge of the top piece of metal, then when doing the bottom portion of the E i will melt the lower piece of metal on the lap joint? 

I could see myself doing the tick tock sound. Would you say you move slightly slower when doing the top and bottom of the E? With a quicker transition between them? Maybe even the top of the E moves slightly slower because its melting 2 pieces of metal.

 
Last edited by a moderator:
Your settings on the panel should look similar to this. If you are using shielding gas the settings are different than flux core. Also a mistake that I’ve done is forgetting to put the ground clamp on the work piece. 
 

11469204-1B04-4A09-AF71-EE4E66E31195.jpeg

 
Thanks man. Tried taking 30 pics of the chart. Theyre all blurry because my phone is old. This is the best i got. 

Screenshot_20220803-133532_Gallery.jpg

20220803_133917.jpg

 
I would be the 3rd line up from the bottom. 

14ga is suggesting D7

 
Good stuff thanks. Will clean the metal nice. Just got a $10 butane torch thats been fun to cook with. Roughly how hot would you preheat the metal? 

I was taught to do little quarter moon shapes. Are you adding the cursive e shape at each end?

edit: i looked up some quick images. If im doing a lap joint i want to top of the E to touch the side, but not go over? During the backstroke i will melt the edge of the top piece of metal, then when doing the bottom portion of the E i will melt the lower piece of metal on the lap joint? 

I could see myself doing the tick tock sound. Would you say you move slightly slower when doing the top and bottom of the E? With a quicker transition between them? Maybe even the top of the E moves slightly slower because its melting 2 pieces of metal.
Any heating will help.  Spit hot is nice, no need for cherry red unless it's cast.

At the end, I go back a little to keep from blowing the corner out.

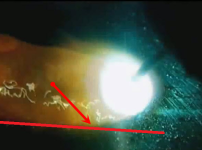
You want the puddle to just kiss, not the arc.  If your e goes to the top, you went too far, see image:

image.png

Pay attention to the widest part of the puddle from the arc (red arrow).  This is your outer limit and what you want to juuuust kiss the top corner of your lap joint (red line in this case).   Try to weld in a straighter line than whoever did this chit, btw. :biggrin:

You're overthinking it.  Just get the timing for the whole motion down so that the above happens.

I watched a lot of this feller's videos back in the day:


Highly suggest you get some coupins and just zap away until you get the hang of it.

 
Thanks for the advice. Looking back my biggest mistake was i should have sanded more paint away. Especially the backside of the weld. Most welds ended with a paint fire. Was windy so i closed the garage and it got smokey. 

Have advice on durable black spray paint brands?

Also do you bleed off the gas? Its not my welder. Me and the owner weren't too sure. Doing more welding tomorrow if that matters to wasting the gas and bleeding it off. 

20220803_181136.jpg

20220803_214244.jpg

 
Last edited by a moderator:
Bleed off after you turn it off? Nah. 

Post weld is useful for keeping the fish eyes from popping up, and putting out the occasional paint fire :biggrin:

 
No need to bleed off but shut the tank off after use. Then, purge the line of air before using again. Some welders have a purge function that kicks on the gas without running out wire. I don't see that option on your welder so unhook the clamp that clamps the wire into the guide roller. When you hit the trigger, the guide roller will still try to feed but since it is unclamped, won't. The gas will be activated though and will purge the air out of the line. Do that for 2-3 seconds, fasten the guide wheel clamp, and you're good to go. 

 
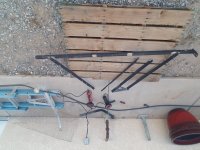
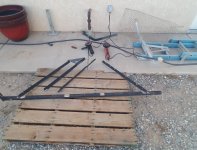
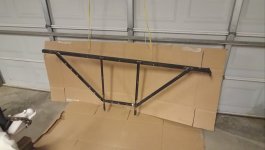
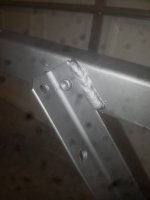
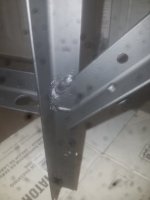
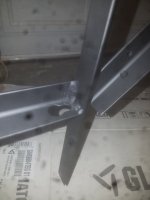
Here it was before paint. It still has the ability to twist a little more than i hoped. 

Not sure im happy with it. Im going to hang from it tomorrow and see how it feels. I guess the TV itself wont be applying twisting motion. Im just a little disappointed how easy i can twist it by hand. 

20220805_215739.jpg

 
Might need to borrow a phone. Will see how it comes out. 

 
Back
Top